stahp.
Info on this page is deprecated. It’s not inaccurate, but there are better ways.
Handbook Environment Setup
Up next are some instructions, for MacOS and Windows, to set up your workstation so that you can participate in developing this handbook.
TL;DR
- Make sure you can log in to GitLab
- Create a folder to put your git repos in
- Install Sourcetree
- Create a personal access token in GitLab and connect Sourcetree to your GitLab account using this token
- Clone the
roivant-it-handbookrepository, check out thedevelopbranch - Make a branch off of
develop, named after yourself - Install Typora, edit the Markdown files in the repository
- Git commit; git push
- Make a merge request in GitLab when youre ready.
Confirm Your GitLab Account and Log In
Your GitLab account should have been auto-provisioned via Okta, and a confirmtion mail sent to your Roivant email address. If you have not confirmed your account, you must do so. If the mail has expired or you otherwise cannot find it, go to the GitLab page to re-send your confirmation mail, enter your email address and look for the mail.
GitLab is Roivant IT’s primary version control system. In a nutshell, a VCS allows a distributed group of people to collaborate on almost any data that can be stored as text in a fast, effective, secure and asynchronous way. GitLab (and GitHub) treat user accounts a bit differently than you may be used to. While your accounts are automatically created vi Okta, GitLab presumes a sort of “bring your own account” scenario, where you must confirm your GitLab account before Okta login will work (see the warning above), then when you click through the Okta tile for the first time, you must associate your GitLab account with your SSO login (just follow the instructions they give)
Make yourself a workspace
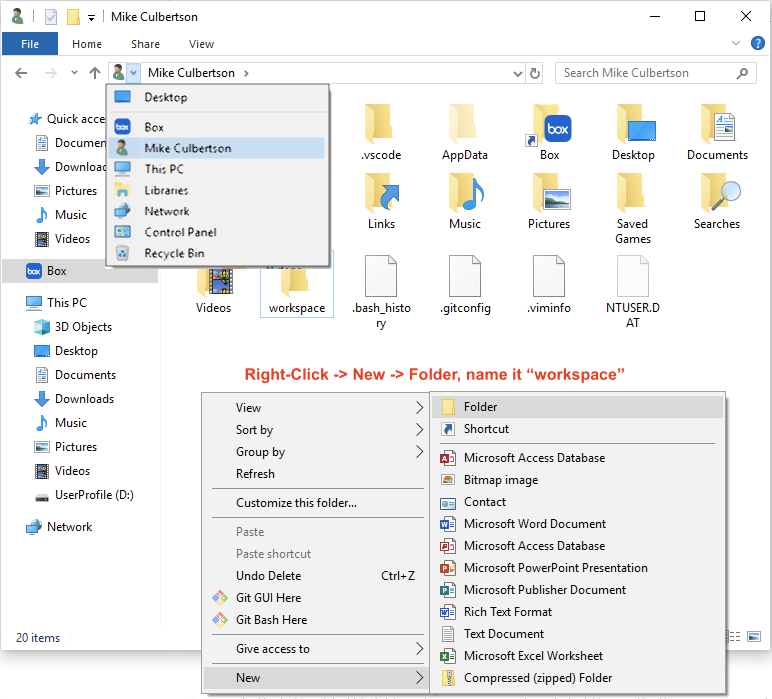
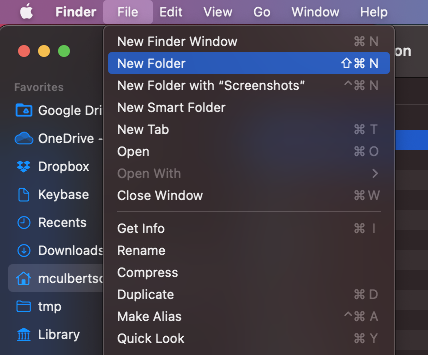
We will need a place to put our data, so we’ll create a “workspace” (literally just a folder). In File Explorer (Windows) or Finder (Mac), make yourself a folder wherever you like. I like to make a “workspace” folder in my home directory.
Mac Workspace Folder
Windows Workspace Folder
Install Sourcetree
Sourcetree is a user friendly, cross-platform, Git GUI for Windows and Mac. We’ll use Sourcetree to log into GitLab and copy data to your machine, where you can work on it. Download and install the program for your OS from the Sourcetree page.
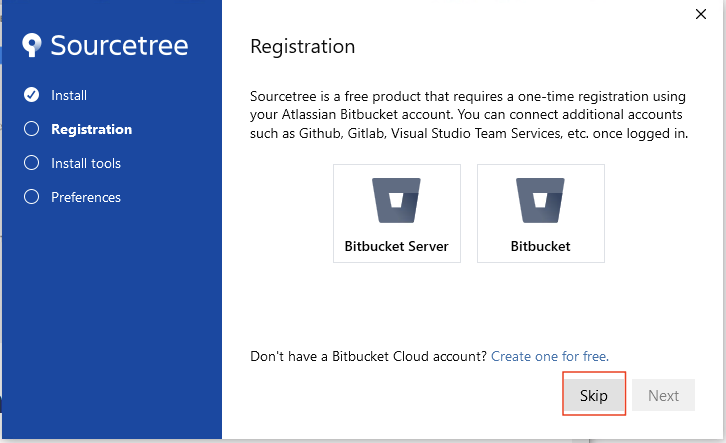
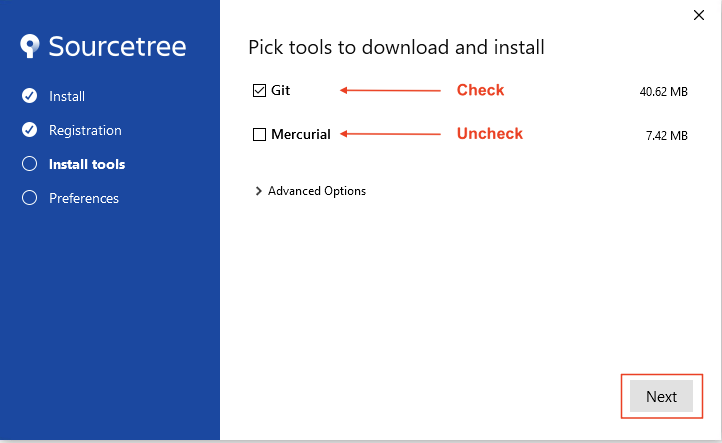
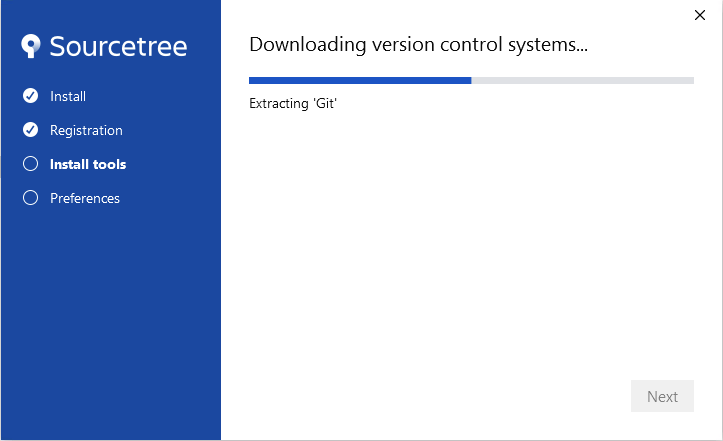
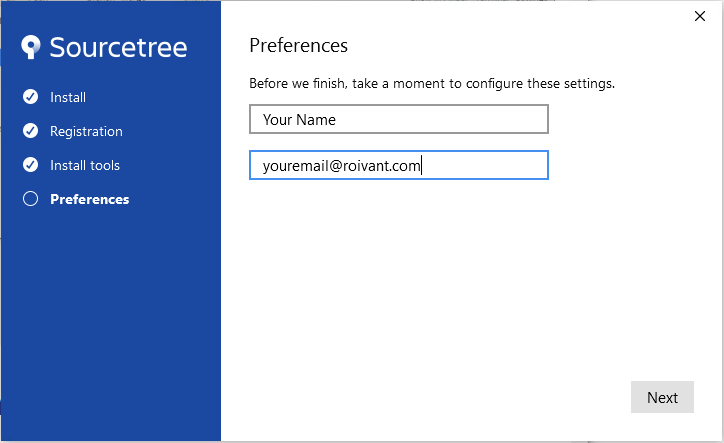
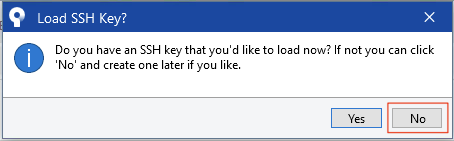
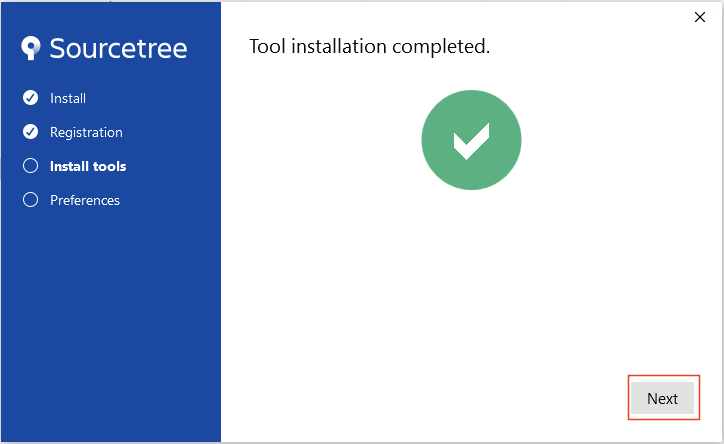
After downloading the Sourcetree installer, double click it to install. 1. You may get prompted by windows to confirm that you want to open the installer. Click “Run” 2. Next, you’ll be prompted to register for “Bitbucket”. This is not needed, click “Skip” 3. On the next dialog, select “Git”, unselect “Mercurial”, click “Next” 4. If it’s not already installed, Git will download and install 5. Next, enter your name and email address, click Next. 6. You may get prompted about an SSH Key - click “No” 7. Install should be completed now
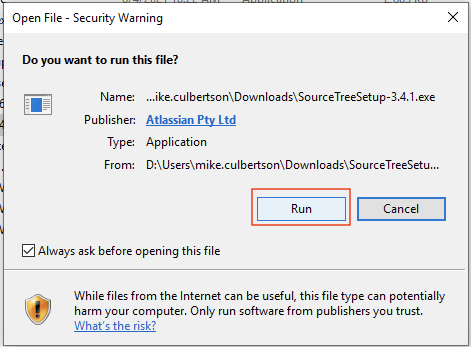
Sourcetree Windows Install Confirm
Sourcetree Windows Install Step 1
Sourcetree Windows Install Step 2
Sourcetree Windows Install Step 3
Sourcetree Windows Install Step 4
Sourcetree Windows Install Step 4
Sourcetree Windows Install Step 4
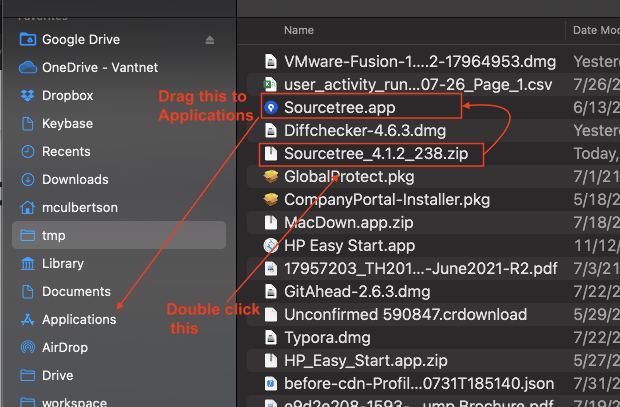
When downloading Sourcetree on a Mac, it will download a zip file. Once this downloads, double-click it and it will extract “Sourcetree” (may appear as “Sourcetree.app”). Drag this to your Applications folder.
Configure Sourcetree
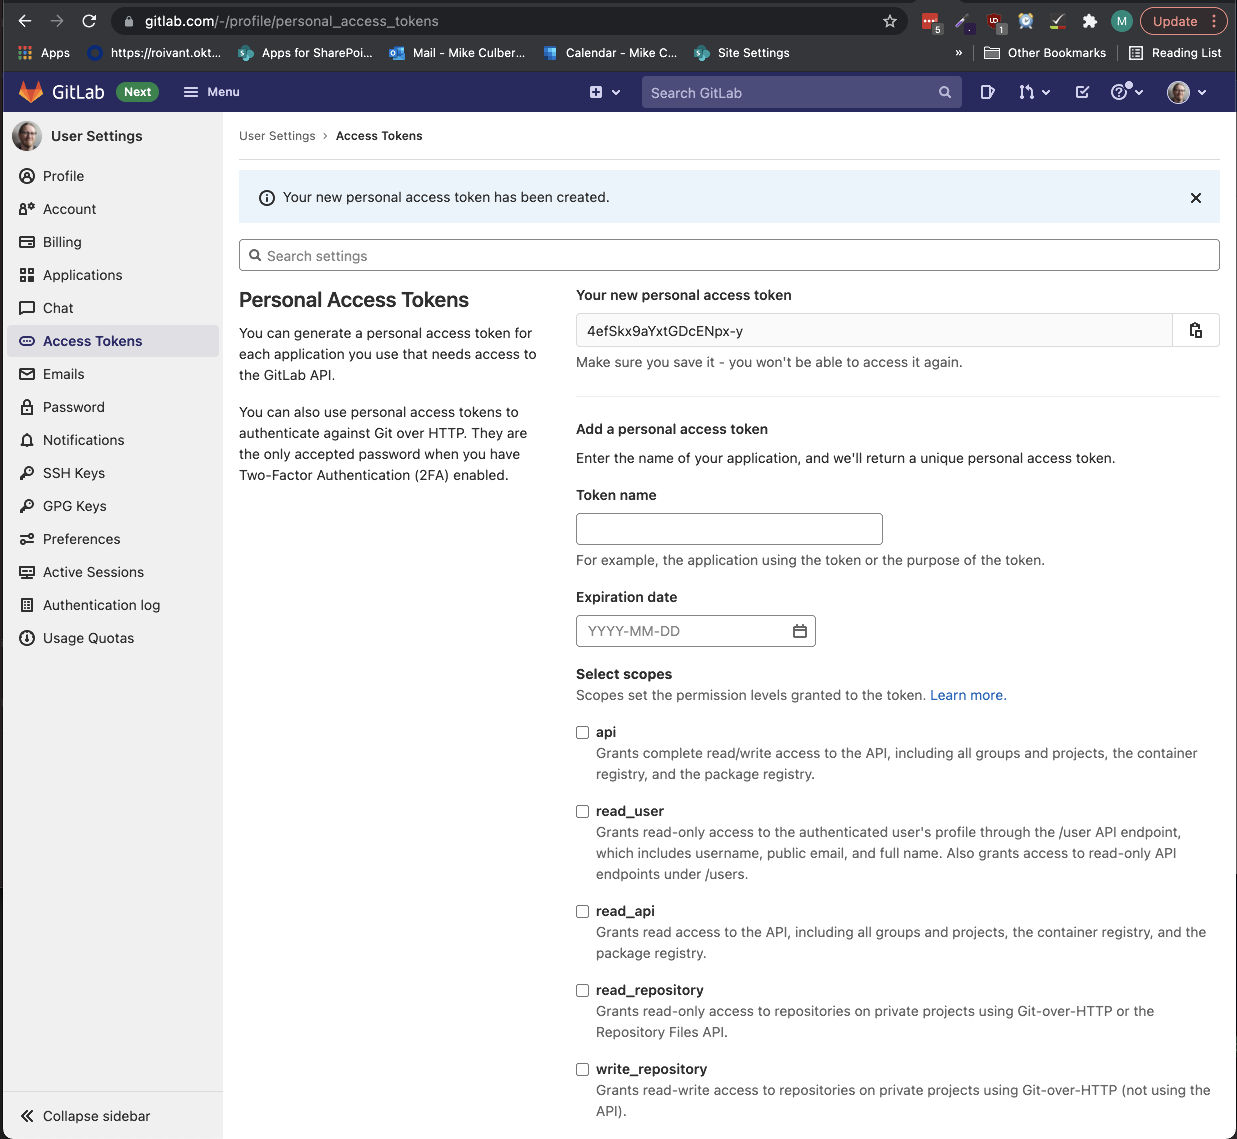
Create a Personal Access Token in GitLab
A Personal Access Token is like a custom password, just for a single purpose. In this case, we’ll use it to log in with Sourcetree. This allows apps like Sourcetree to log in to GitLab without having to go through Okta.
Click here to go to the GitLab Personal Access Tokens page
Open the page above. In the Token Name field, enter something descriptive like “Sourcetree”. Select api from the checkboxes
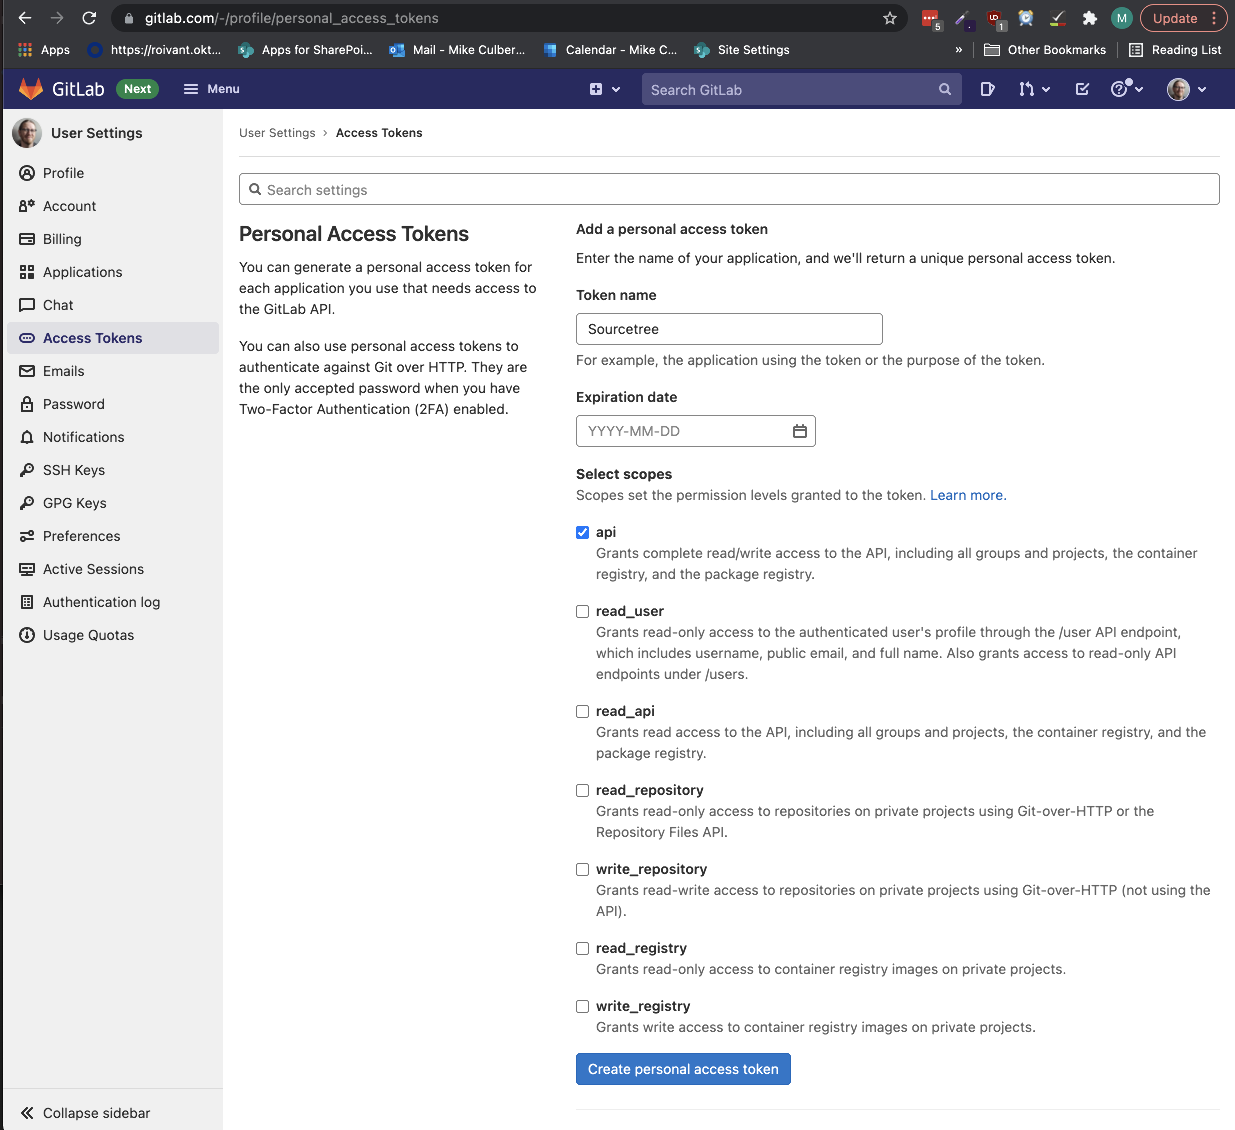
Next, your token will be displayed. You're going to need this and you'll only see it **once**. *DO NOT CLOSE THIS PAGE YET*.
You can easily copy your token by clicking the clipboard icon next to the token field.
Add your GitLab account to Sourcetree
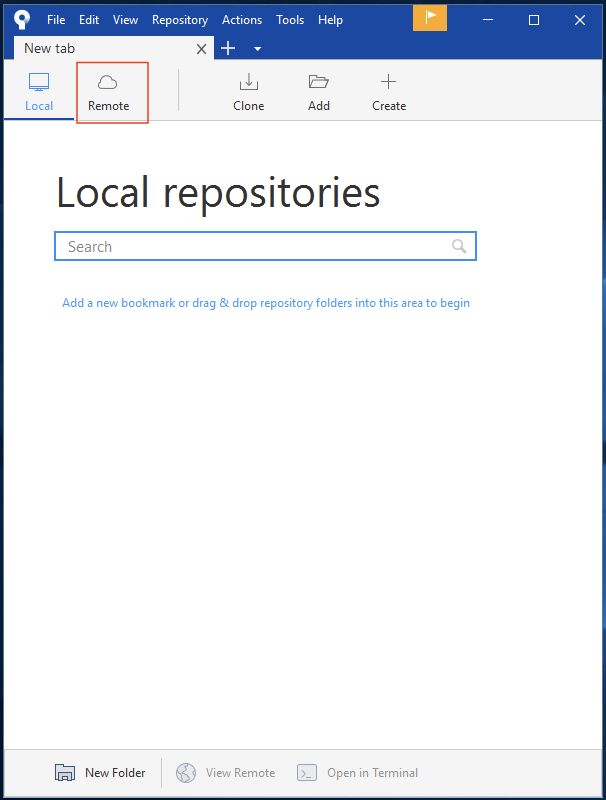
Once installation on Windows is complete, you should land on this screen. Click on “Remote”.
Sourcetree Windows 1
Sourcetree Windows 2
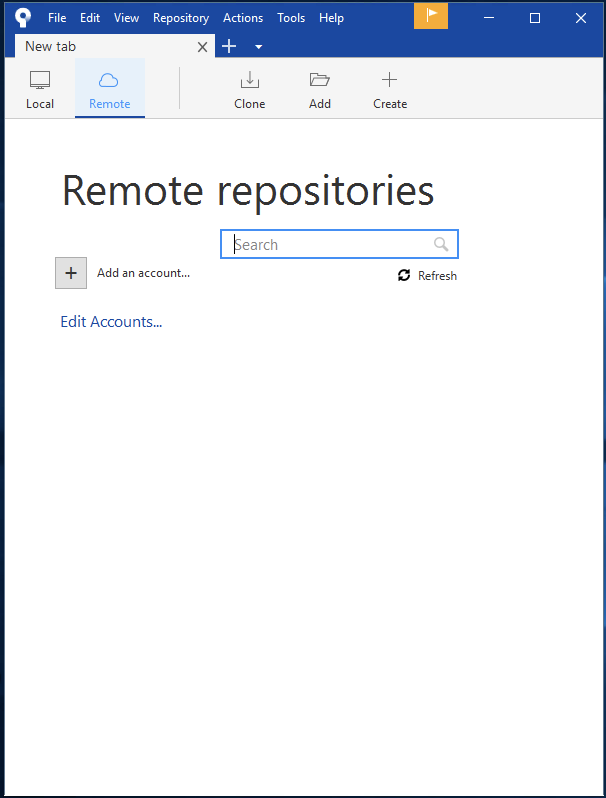
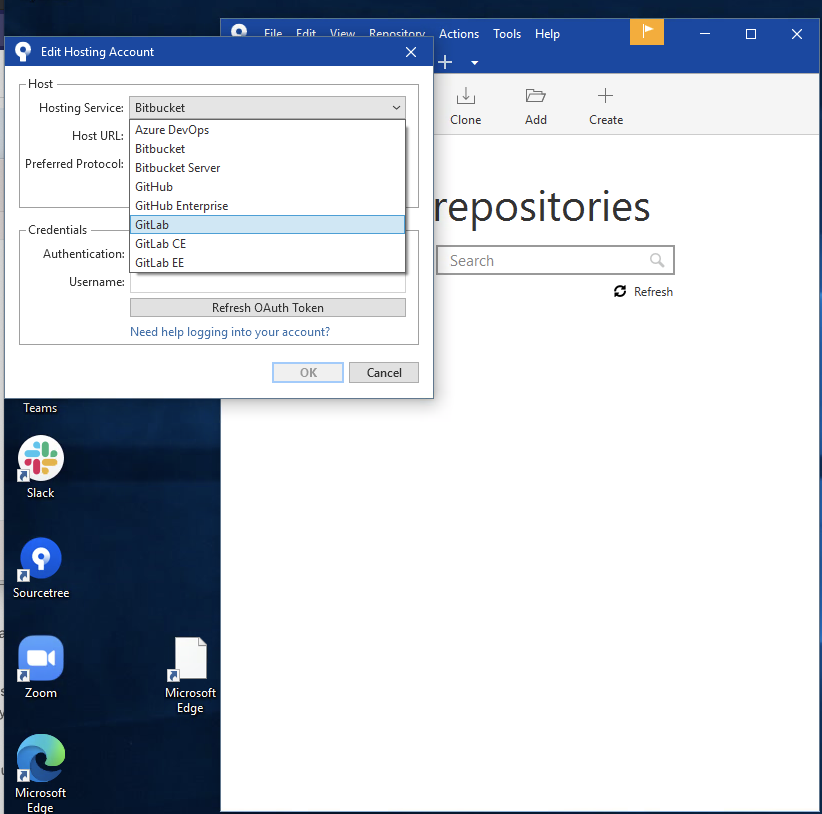
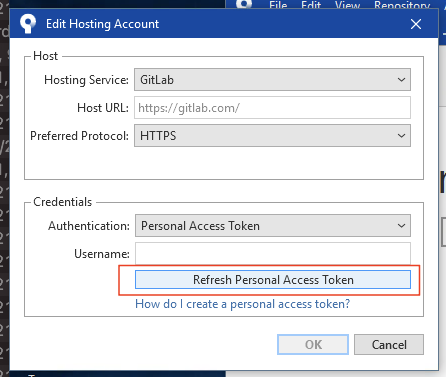
Click on "Add an Account". From the "Hosting Service" dropdown, select "GitLab".
After you select GitLab, click on "Refresh Personal Access Token".
Sourcetree Windows Account Setup 1
Sourcetree Windows Account Setup 2
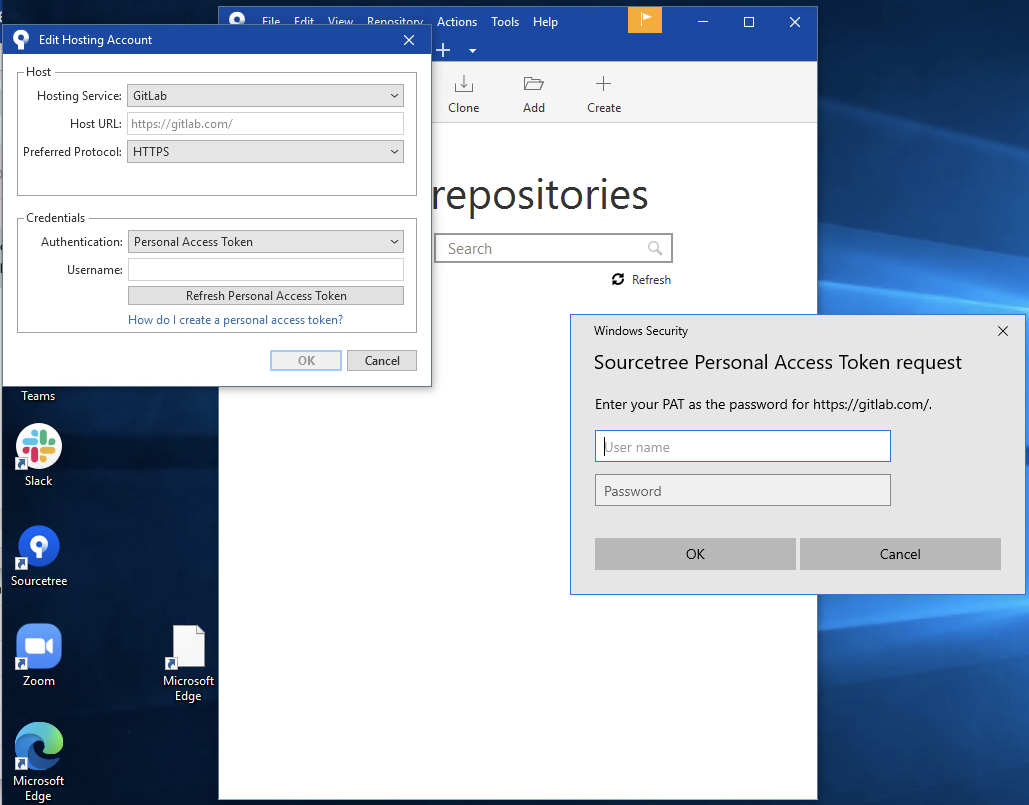
After you click "Refresh Personal Access Token", a login dialog should pop up.
Username is your [GitLab username](/images/howto/env-setup/gitlab-username.png) _without_ the "@", e.g. `firstname.lastname`, or whatever you chose during [Setup Your GitLab Account](#set-up-your-gitlab-account)
Password is the **Personal Access Token** you created in the previous section
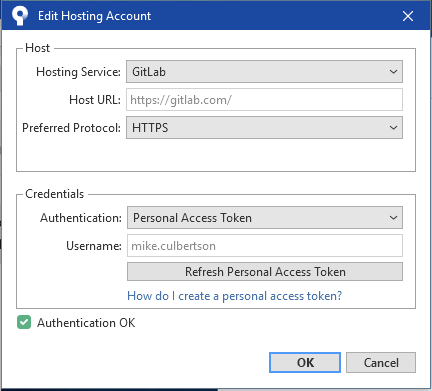
Hit "OK" and you should get an "Authentication OK" message.
Sourcetree Windows Account Setup 3
Sourcetree Windows Account Setup 4
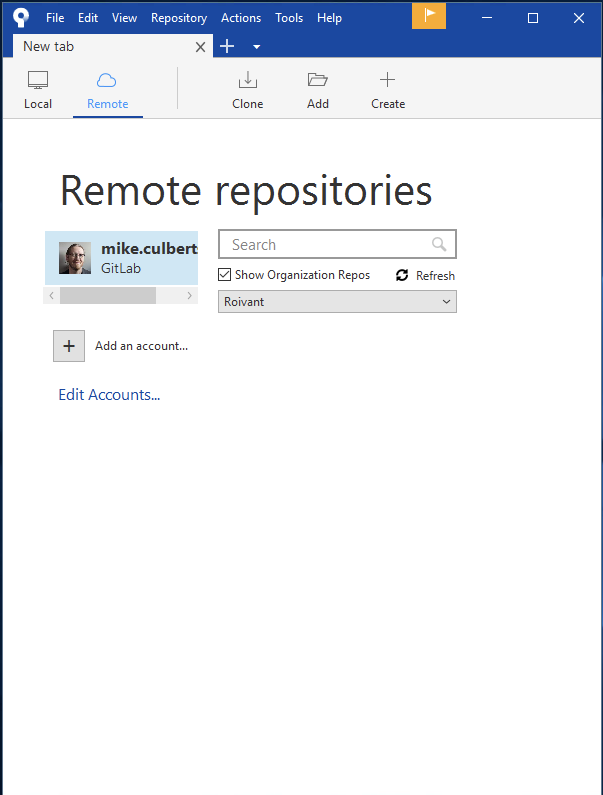
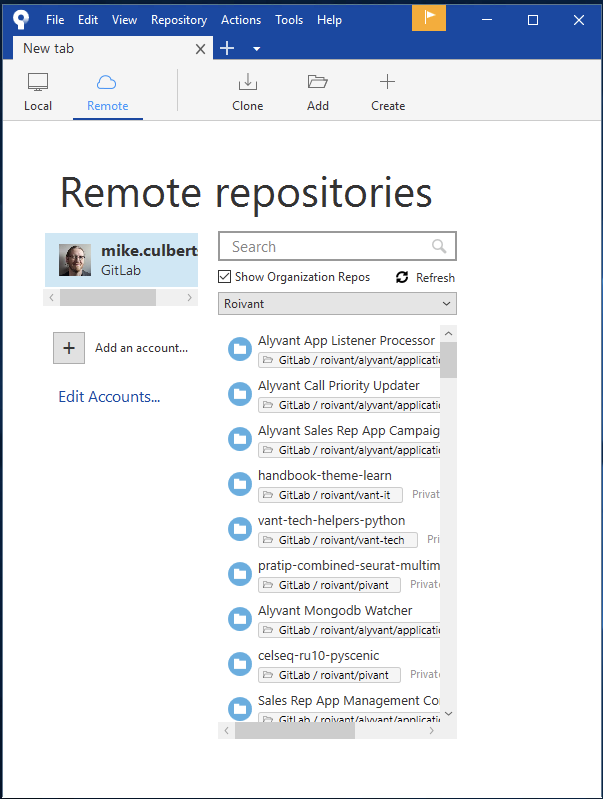
Hit "OK" and you should return to the main Sourcetree window, which should now show your GitLab account and a list of repositories.
Windows gets a little tricky here, and we had problems getting the repository list to show up (though it was successfully connected.) If you don’t see a list like in the right-hand image, try unchecking and rechecking “Show Organization Repos”. We had to do this a few different times, it’s a bug.
Sourcetree Windows Account Setup 5
Sourcetree Windows Account Setup 6
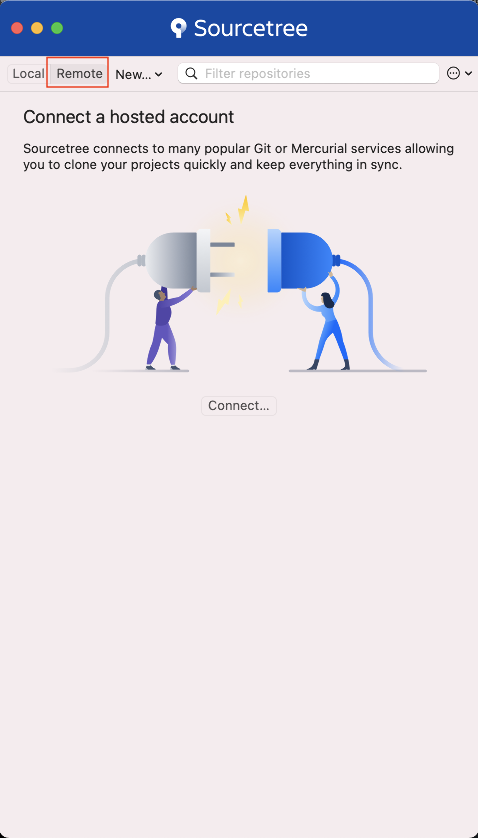
Once installation on Mac is complete, you should land on this screen. Click on “Remote”.
Sourcetree Mac Account Setup Start
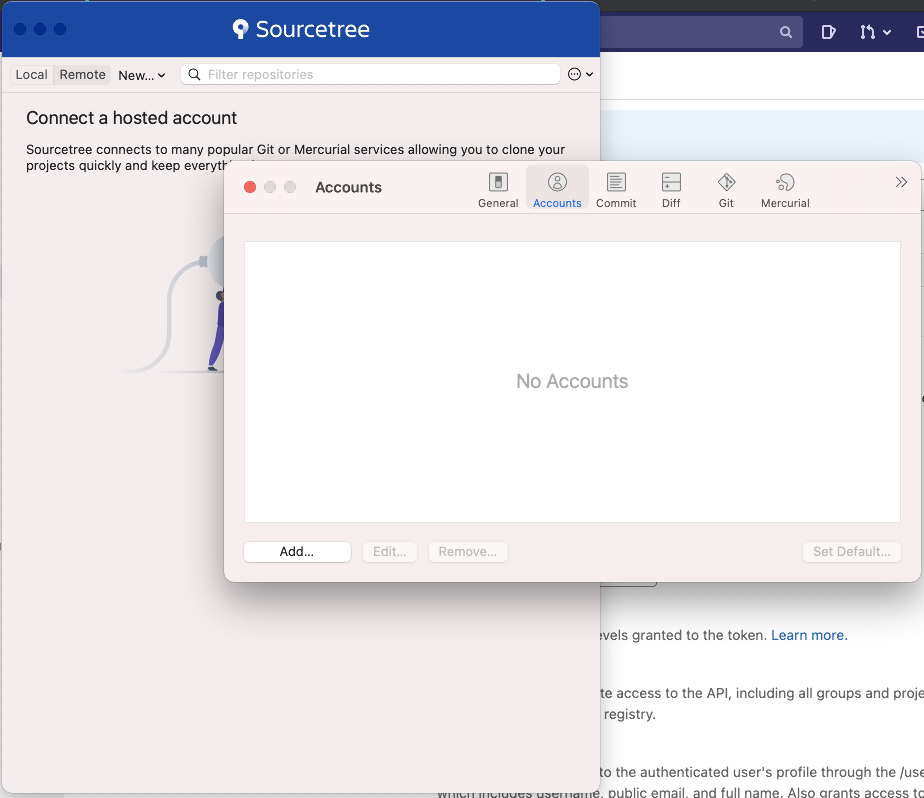
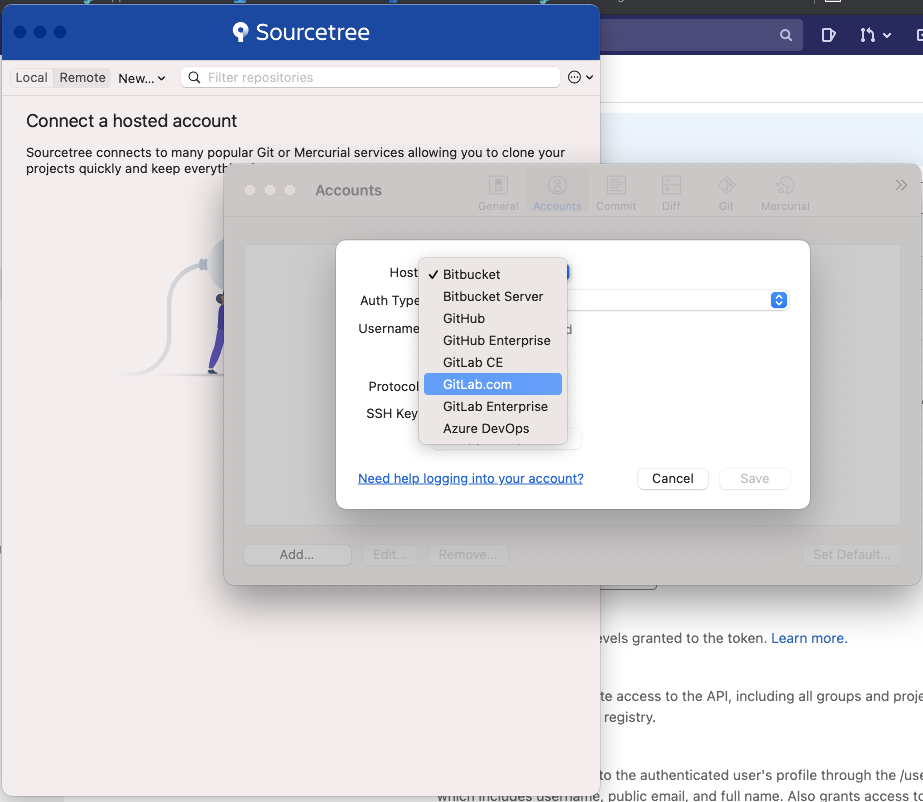
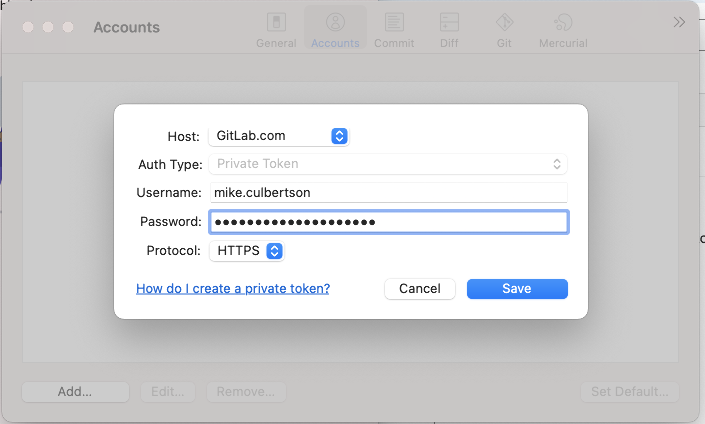
Click on “Connect”. From the “Host” dropdown, select “GitLab.com”.
Sourcetree Mac Account Setup 1
Sourcetree Mac Account Setup 2
Set “Protocol” to HTTPS, and enter your login information.
Username is your GitLab username without the “@”, e.g. firstname.lastname
Password is the Personal Access Token you created in the previous section
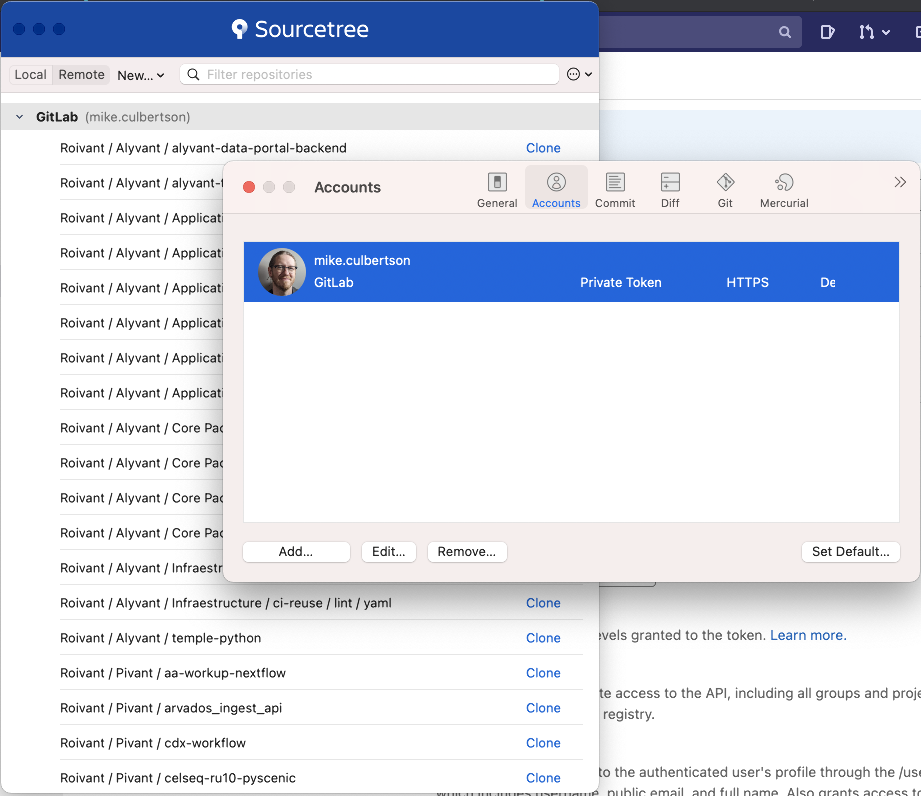
Hit “OK” and you should return to the accounts list with your GitLab avi and username visible.
Sourcetree Mac Account Setup 3
Sourcetree Mac Account Setup 4
Point Sourcetree to your Workspace
For this step, we simply configure Sourcetree to use the workspace folder we created above, to store data it downloads from GitLab.
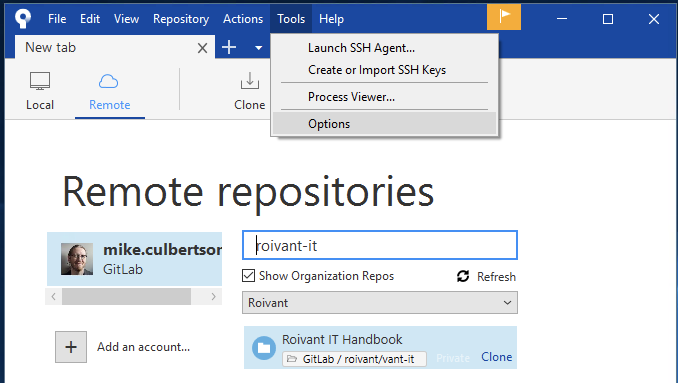
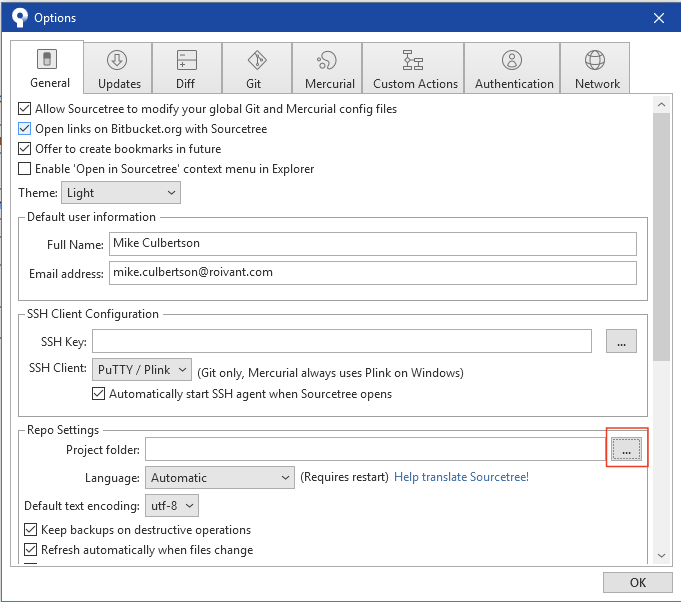
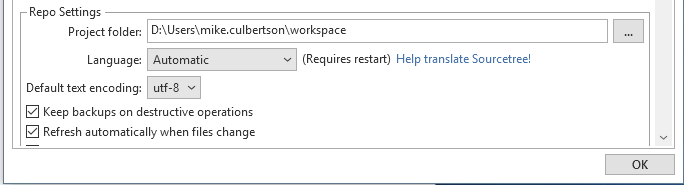
From the main options window, look for "Repo Settings -> Project Folder". Hit the three dots next to this field.
Sourcetree Windows Options 1
Sourcetree Windows Options 2
Browse to where you created your workspace folder, and select your workspace folder. Hit “Select Folder”.
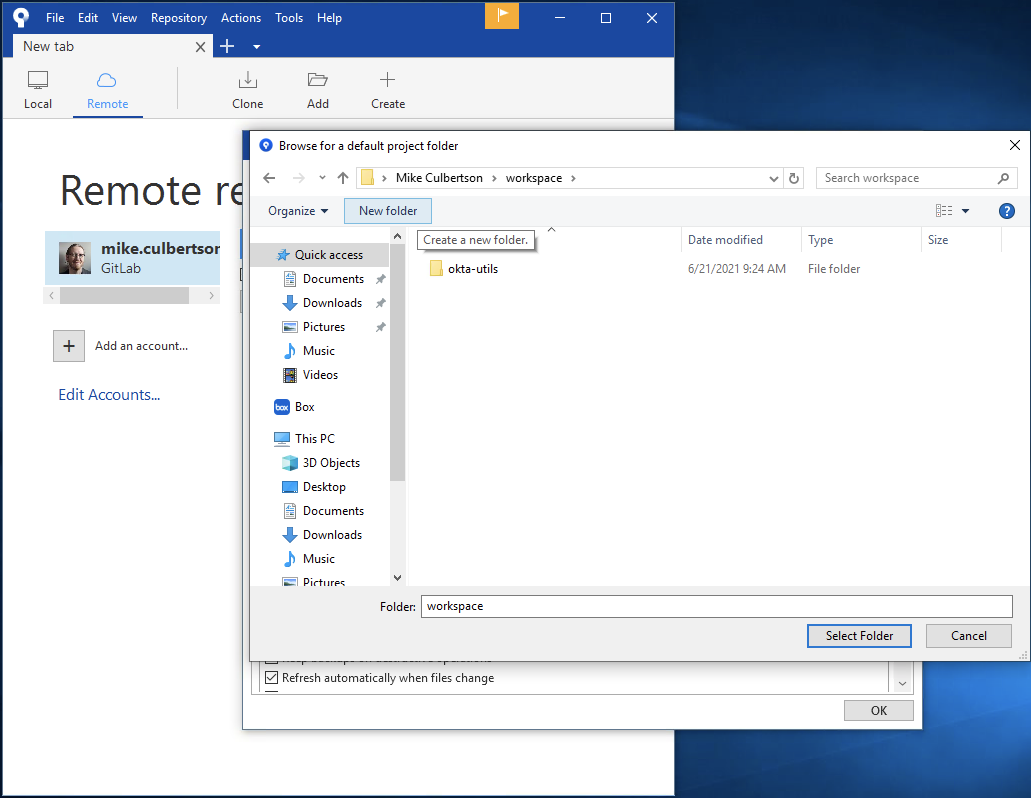
Sourcetree Windows Options 3
Sourcetree Windows Options 4
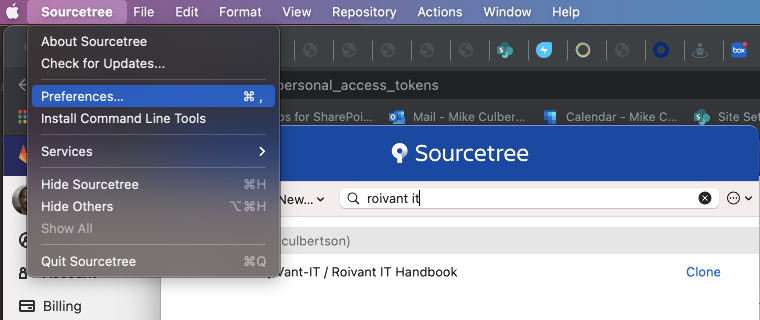
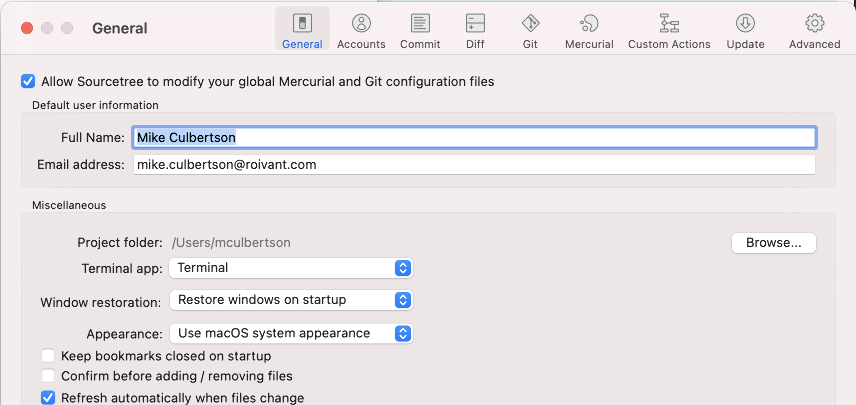
From the "General" section of the options window, look for "Miscellaneous -> Project Folder". Hit the "Browse" button.
Sourcetree Windows Clone Repo 1
Sourcetree Windows Clone Repo 2
Browse to where you created your workspace folder, and select your workspace folder.
Hit “OK”. Close the preferences dialog to go back to the main Sourcetree window.

Sourcetree Windows Clone Repo 3
Clone the Handbook Repo
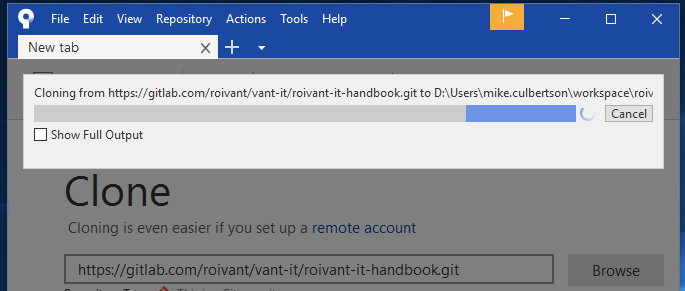
In this stage, we are going to clone the Roivant IT Handbook git repository. This bring an entire and complete copy of the handbook to your local machine, where you can add, remove and change pages, and submit the changes for integration into the handbook.
During this stage, I found that Sourcetree on Windows had a tendency to throw errors. However, they were not actually critical, and all the operations completed as expected. If you hit errors, try ignoring them, but if you run into a problem that prevents you from continuing, post a message in #roivant-it-ref. If it keeps up, we’ll try a different client for Windows.
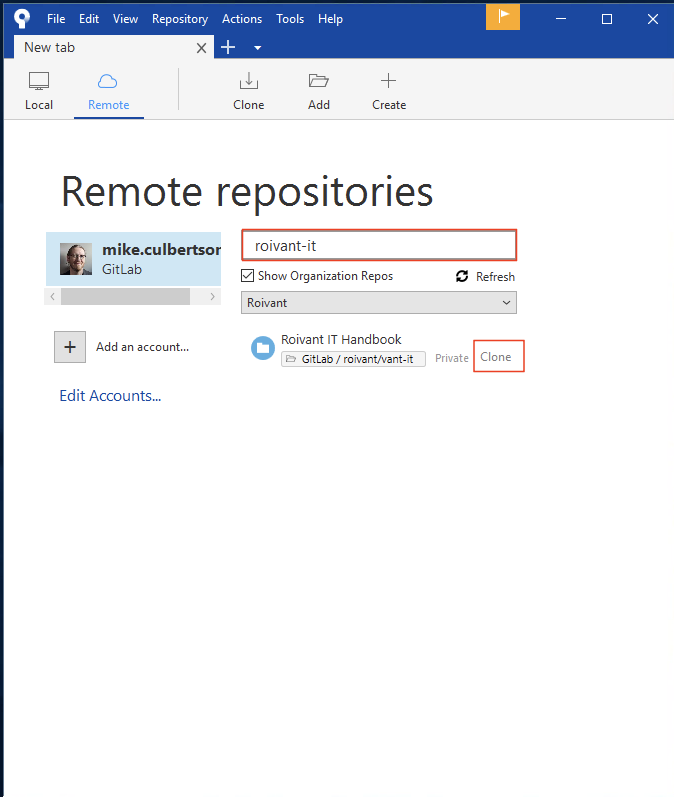
Find the “roivant-it-handbook” repo in the repo list after connecting your GitLab account.
If you see a big list, and have trouble locating it, use the text box above the list to search.
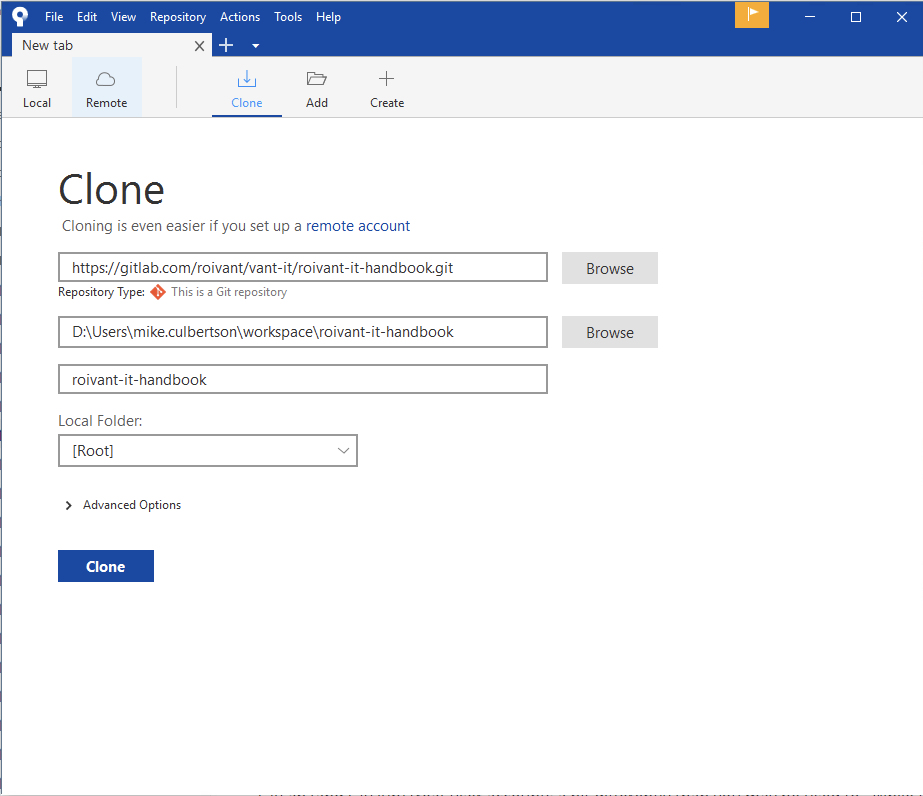
Click the “Clone” link next to the repo entry. When the Clone dialog pops up, hit the “Clone” button
Sourcetree Windows Clone Repo 1
Sourcetree Windows Clone Repo 2
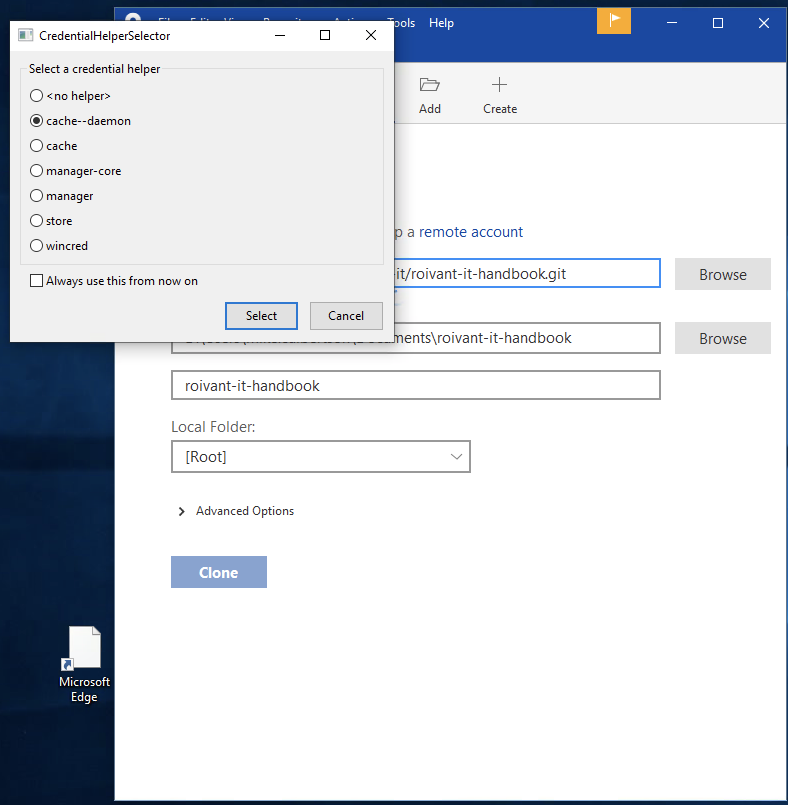
You **may** get a popup about "CredentialHelperSelector". If you do, select `cache--daemon` and click "Select".
Sourcetree Windows Clone Repo 3
Sourcetree Windows Clone Repo 4
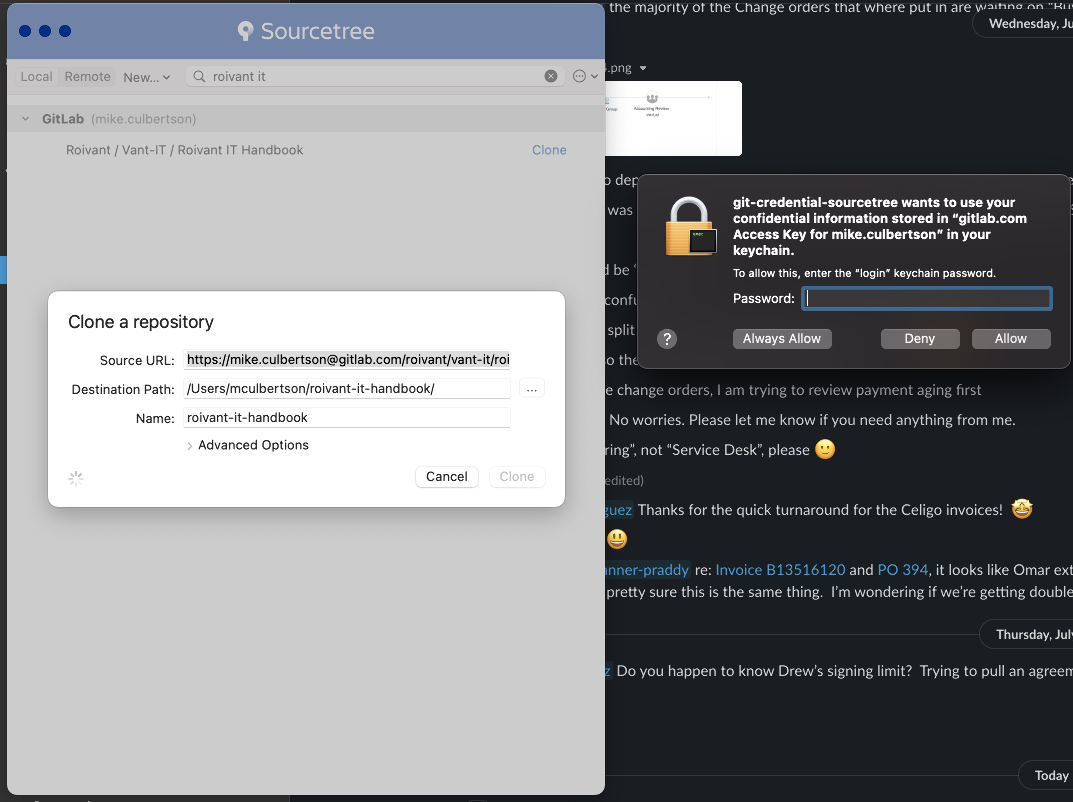
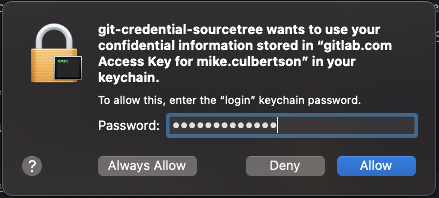
You will almost certainly get multiple authorization popups about Sourcetree wanting to use your “confidential information”. This is just the program accessing your Mac Keychain and it’s a good thing. Enter your laptop password and hit “Always Allow” and they’ll stop popping up.
Hit the "Clone" link next to the repo entry. In the "Clone a Repository" dialog, ensure the paths look correct and click "Clone".

Sourcetree Mac Clone Repo 1
Sourcetree Mac Clone Repo 2
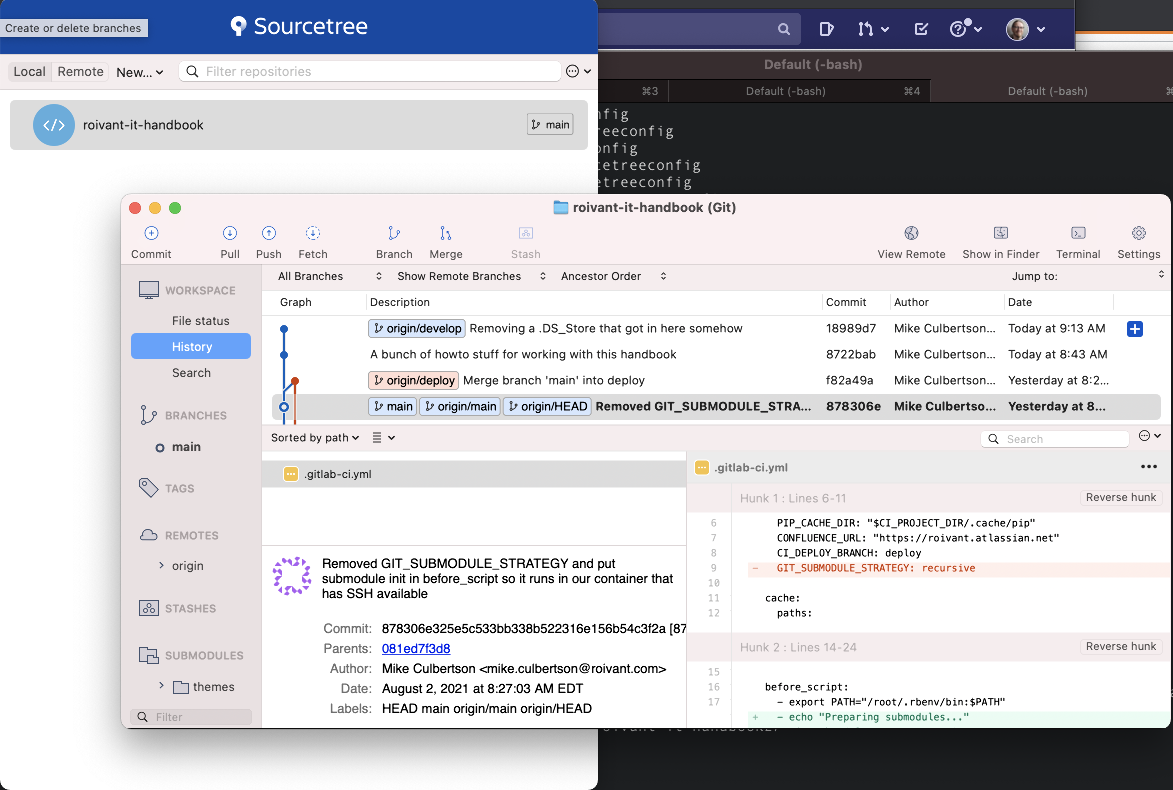
After another authorization dialog or two, you will be presented with a Git view of your cloned repository. Move on to the next stage.
Sourcetree Mac Clone Repo 3
Sourcetree Mac Clone Repo 4
Create your personal branch
In this step, we’re going to create a git branch to store your changes to the handbook. This allows you to work on any and all parts of the handbook, while your colleagues work on their own branches. These changes can then be merged together for the main handbook.
During this stage, I found that Sourcetree on Windows had a tendency to throw errors. However, they were not actually critical, and all the operations completed as expected. If you hit errors, try ignoring them, but if you run into a problem that prevents you from continuing, post a message in #roivant-it-ref. If it keeps up, we’ll try a different client for Windows.
Once the clone completes, Sourcetree should open a window showing your local copy of “roivant-it-handbook”.
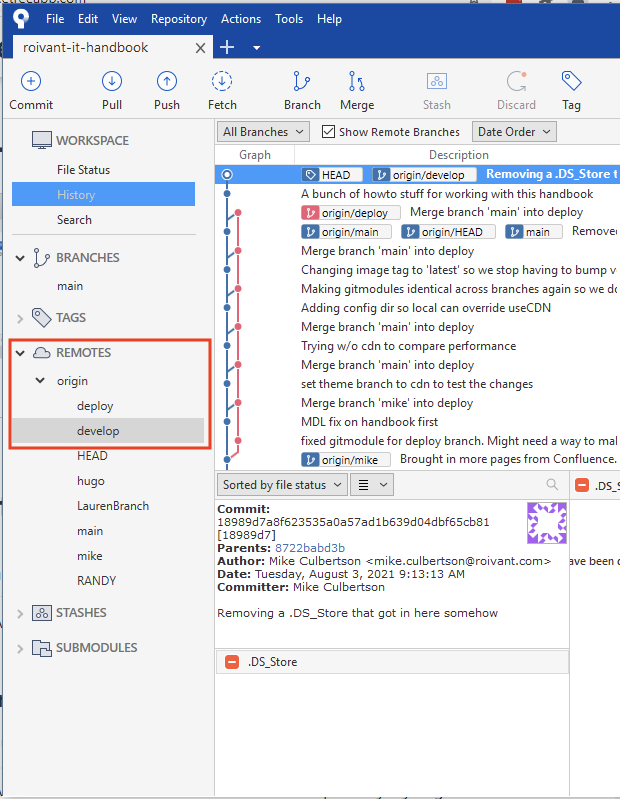
Expand the list under “Remotes” and “origin”
Locate develop under “origin”, right-click it and select “Checkout origin/develop”
Sourcetree Windows Branch 1
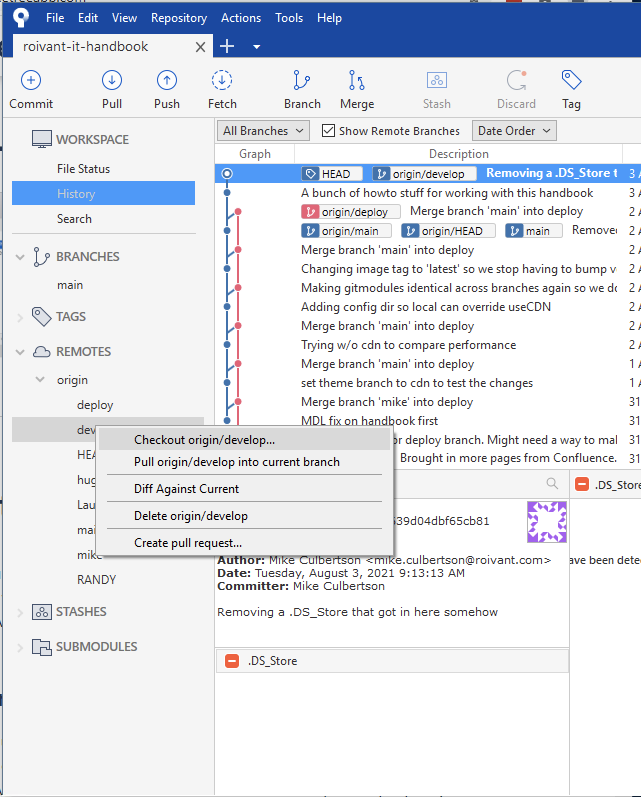
Sourcetree Windows Branch 2
In the “Checkout” popup, leave the values at default - they should match the lefthand image below. Once you confirm this, click “OK”
You may get a warning as shown in the right-hand image below. If you get such a warning, disregard it and click “Yes”.
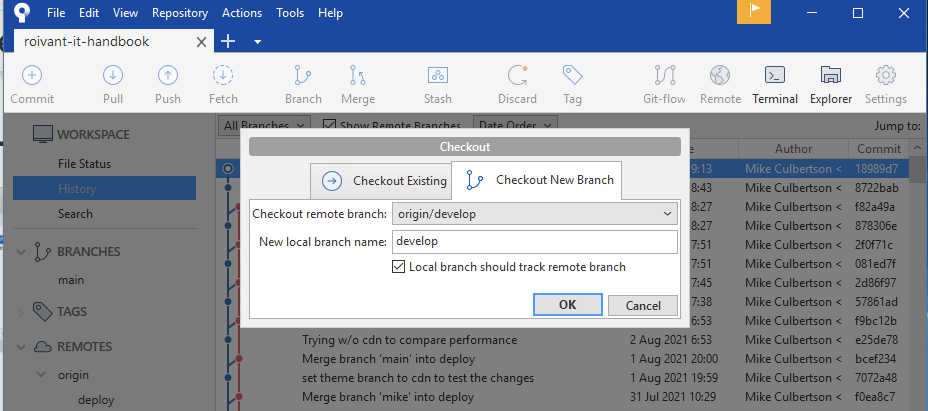
Sourcetree Windows Branch 3
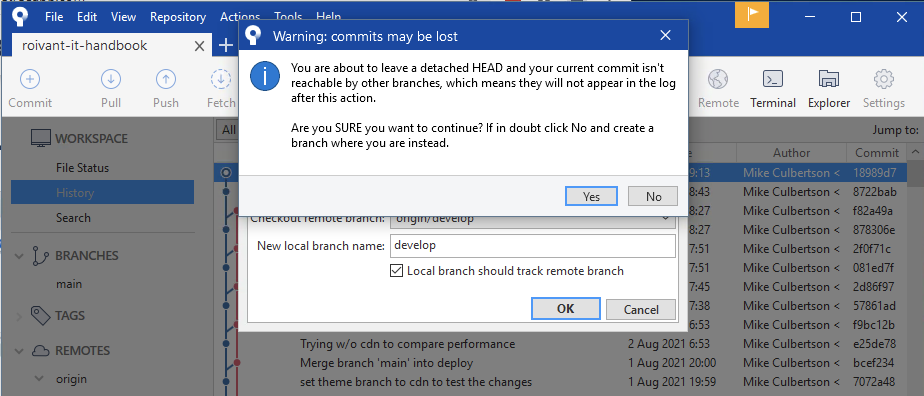
Sourcetree Windows Branch 4
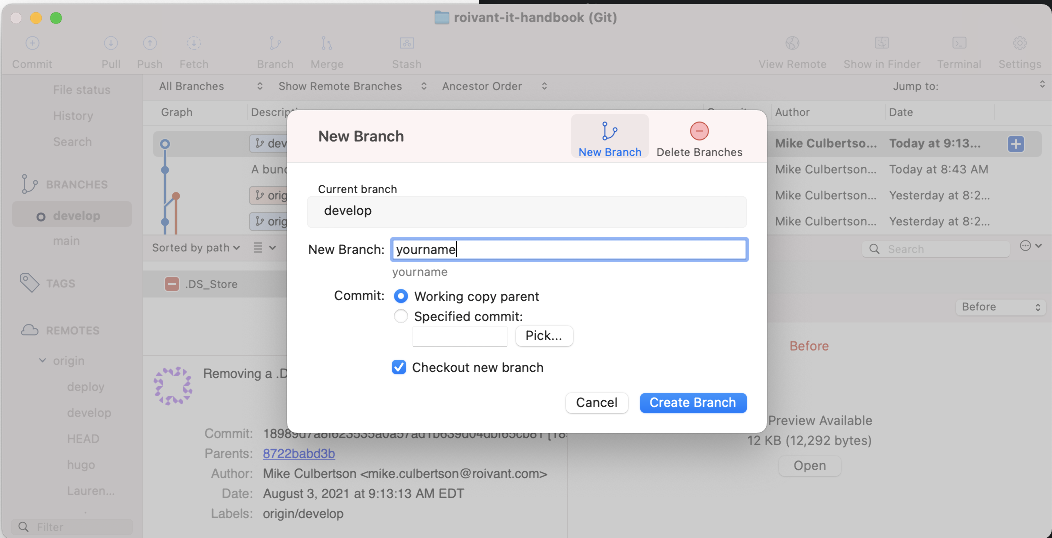
After the develop branch finishes checking out, make sure develop is selected at the left of the window under “BRANCHES”, and hit the “Branch” button
In the “New Branch” dialog, name your new branch after yourself in some way so your colleagues can tell it’s you. Dashes, underscores are fine NO SPACES, NO PUNCTUATION PLEASE, then click “Create Branch”
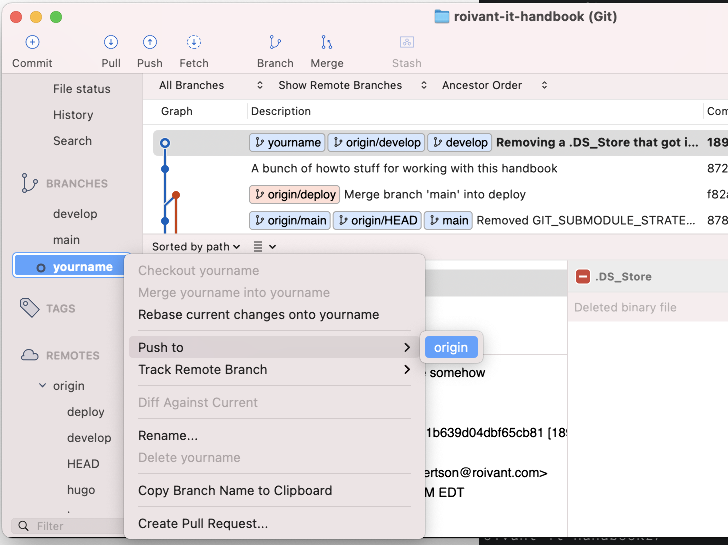
Once this operation completes, select your new branch on the left under “BRANCHES”, right-click it and select “Push to -> origin”.
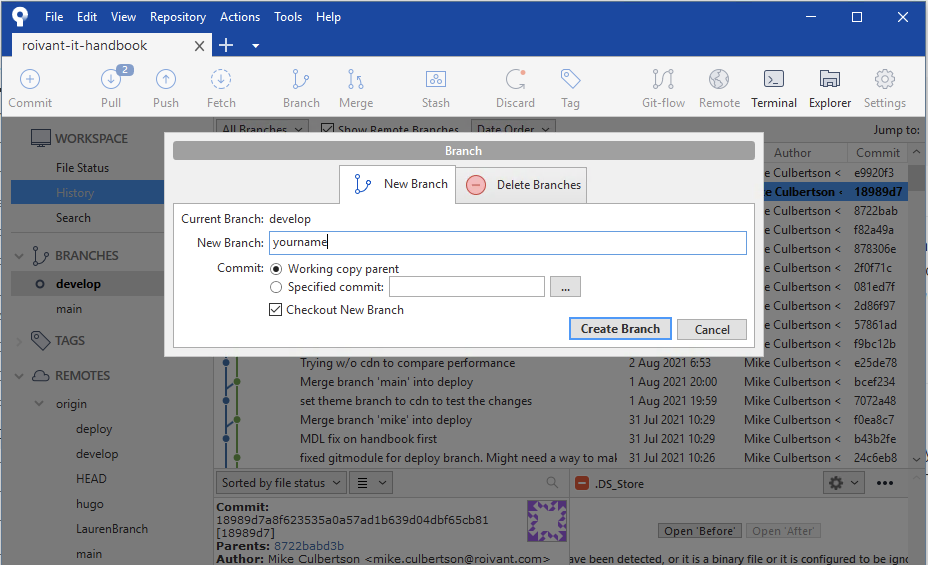
Sourcetree Windows Branch 5
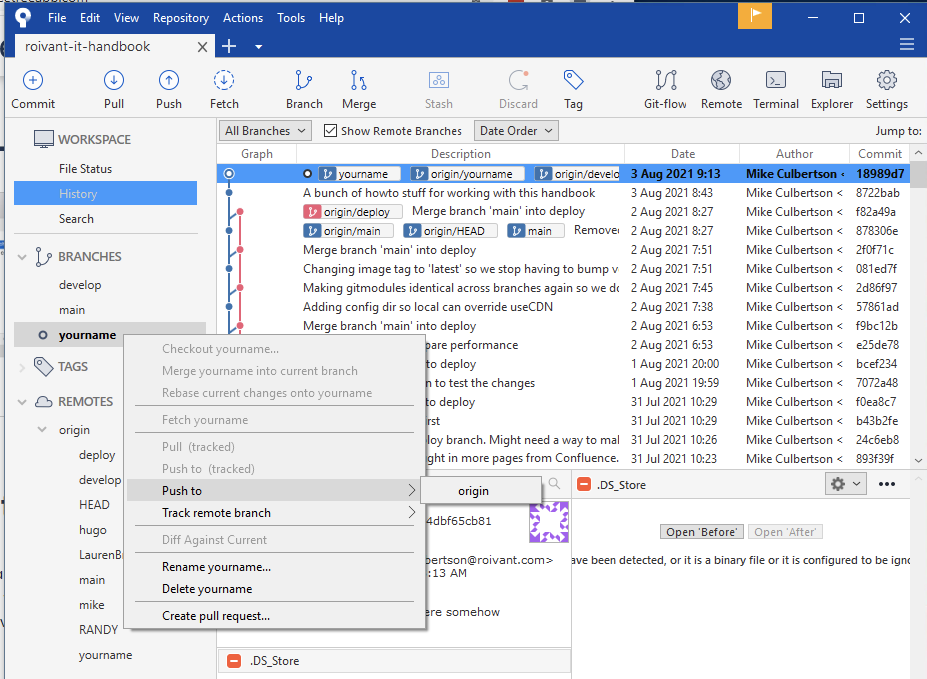
Sourcetree Windows Branch 6
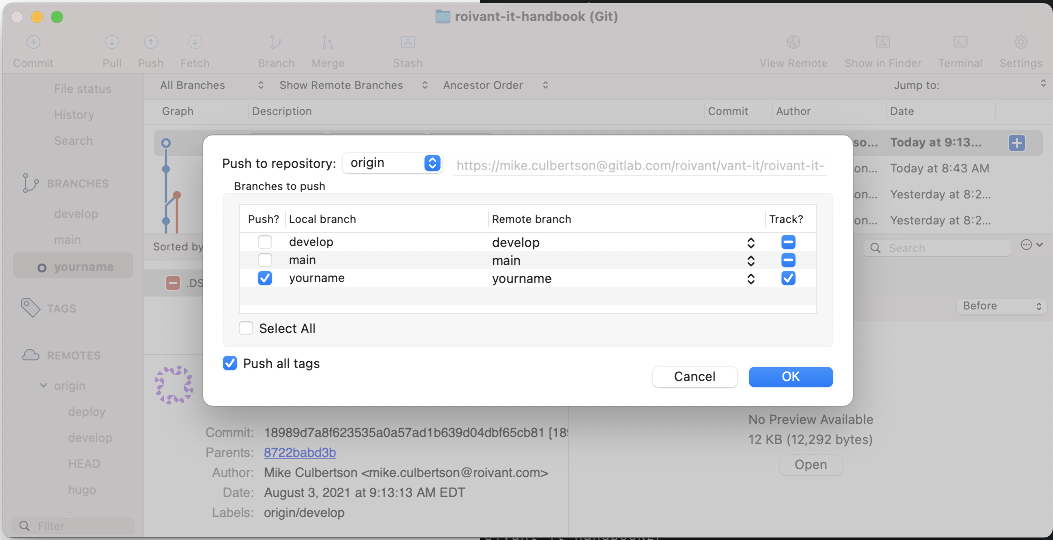
In the “Push” dialog, ensure that your “Local branch” and “Remote branch” names are the same, and that it is the only one checked. Click “Push”

Sourcetree Windows Branch 7
Once the clone completes, Sourcetree should open a window showing your local copy of “roivant-it-handbook”.
Expand the list under “Remotes” and “origin”. Locate develop under “origin”, right-click it and select “Checkout”
In the “Checkout new branch” dialog, ensure “Local branch should track remote branch” is checked and click “Checkout”
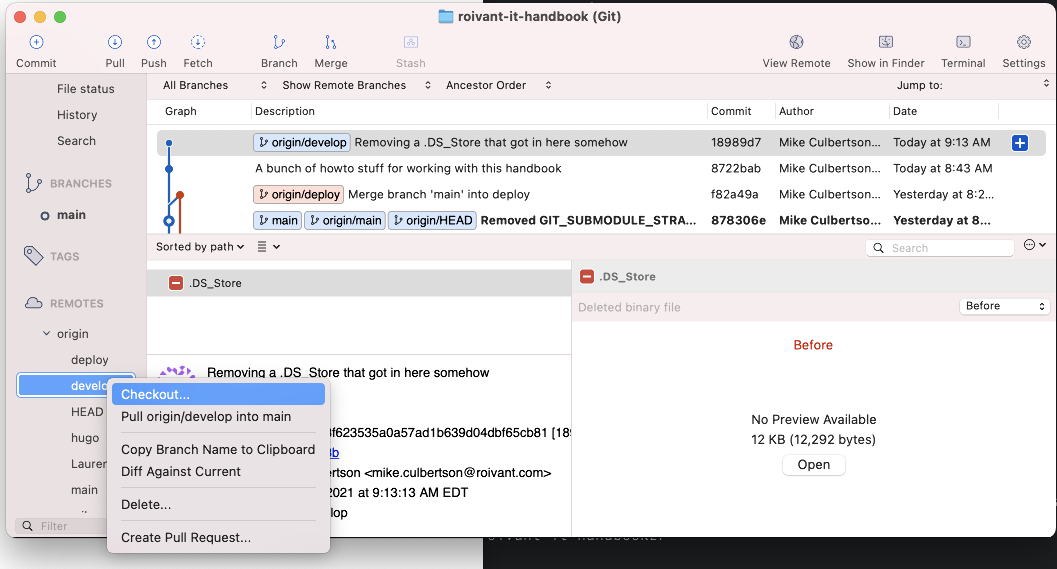
Sourcetree Mac Branch 1
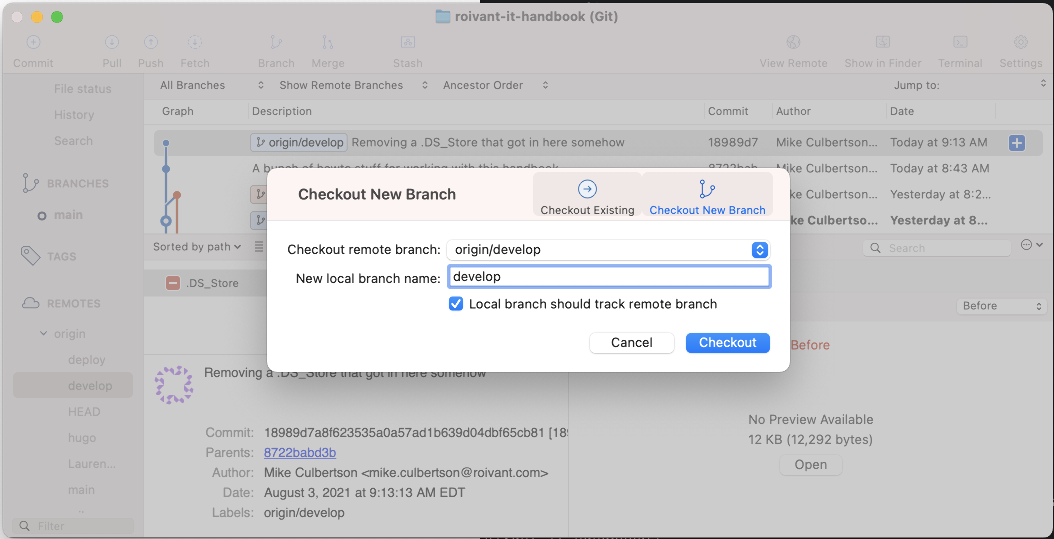
Sourcetree Mac Branch 2
When the checkout completes, you should see the develop branch should be visible at the left of the window under “BRANCHES”
Select develop and click the “Branch” button at the top of the window.
In the “New Branch” dialog, name your new branch after yourself in some way so your colleagues can tell it’s you. Dashes, underscores are fine NO SPACES, NO PUNCTUATION PLEASE, then click “Create Branch”
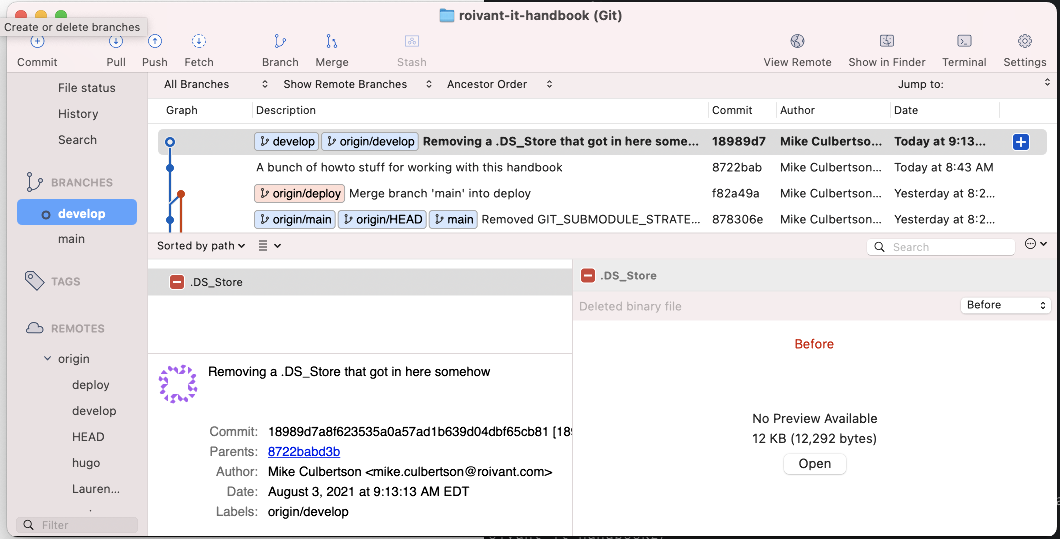
Sourcetree Mac Branch 3
Sourcetree Mac Branch 4
Once this operation completes, select your new branch on the left under “BRANCHES”, right-click it and select “Push to -> origin”.
In the “Push” dialog, ensure that your “Local branch” and “Remote branch” names are the same, and that it is the only one checked. Click “Push”
Sourcetree Mac Branch 5