This guide covers the process of using your Handbook environment, Typora and Git (Sourcetree) to commit your changes, push them to GitLab and submitting a merge request to have them integrated into the Handbook. I will use the authoring of this page to demonstrate this process.

Overview
This HOWTO presumes that you have already set up your local environment and that you’re able to edit Markdown with Typora
In a basic form, collaborating as-code with git involves pulling or fetching (downloading) changes from GitLab to your local environment, merging from branches into your personal branch (basically, combining changes from others into your copy), modifying/adding content in the handbook with Typora or other editors, then pushing your changes to GitLab, and submiting merge requests (a request for the handbook owners to integrate changes from your branch into the published handbook). We are working out of several primary branches
- main The primary, default branch, maintained by the handbook owners. This is where everyone’s changes get merged together. This branch is protected, and can only be pushed/merged by owners.
- develop Sort of a staging area to merge changes together before adding them to main. This is the branch used by the Web IDE by default, and anyone can modify it.
- yourname/hername/hisname Branches “belonging” to individuals, where they can make whatever changes they want, before submitting a merge request for those changes to be added to develop or main
As you author or modify pages, the step-by-step process looks like this
Flow
A note on branches - all branches are independent to the copy of the repository they’re created in. However, it’s general practice to have a local branch “track” a remote branch of the same name. For example, when we created our personal branch and then pushed it, this set up an association between “mike” (local) and “origin/mike” (remote).
Pulling / Fetching
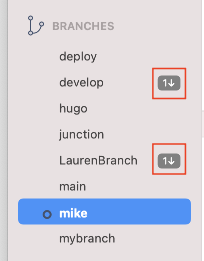
In Sourcetree, make sure your personal branch is selected and highlighted on the left under BRANCHES. Hit the Fetch
button, check “Fetch from all remotes”. When this completes, if any of the branches have new changes, you’ll see a
number, with a down arrow next to them (like “1 ↓”)
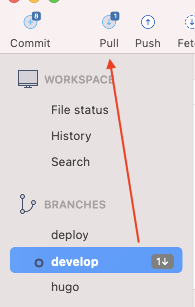
Fetching alone will only show you the changes from remote branches, but it won’t pull them in to your local branch
copies. To complete this, double-click on the branch with new changes (in this case, “develop”), note that the “Pull”
button now has a number next to it. Then hit “Pull” to merge the changes in develop into your local copy of develop
Merge develop into mike
Confirm the merge
Review changes from others and optionally merge
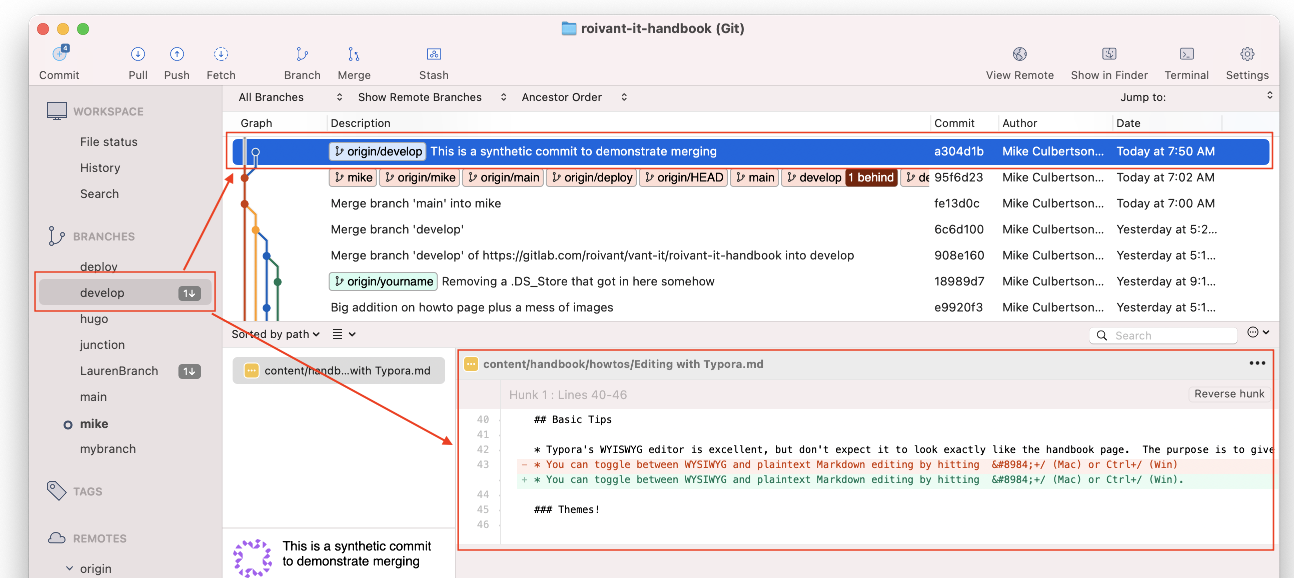
To look at the changes you just fetched, select the branch with changes on the left, and the topmost item in the graph pane whose name matches the branch you want to look at. Sourcetree will show you the changes that were made, which you can review.
As a rule, you want to merge in all changes from the “big” branches, such as main and develop, to ensure your
branch is up to date. Branches from colleagues are optional to merge at this stage, as they’ll eventually end up in
main or develop anyway
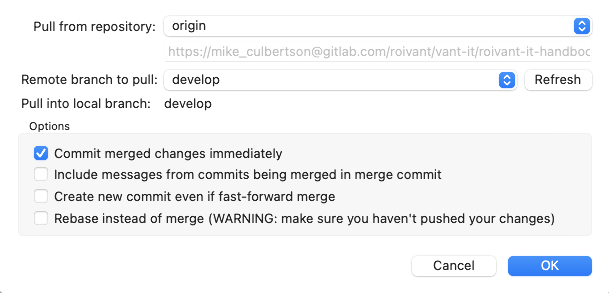
To merge in changes to your branch, right-click the branch with the changes (in this case, “develop”) on the left, and select “Merge [branchname] into [yourbranch]”. You’ll be prompted to confirm this action. Leave the settings at default and click “OK”
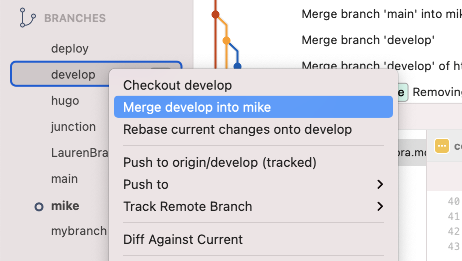
Merge develop into mike
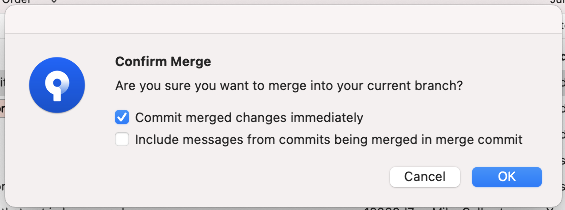
Confirm the merge
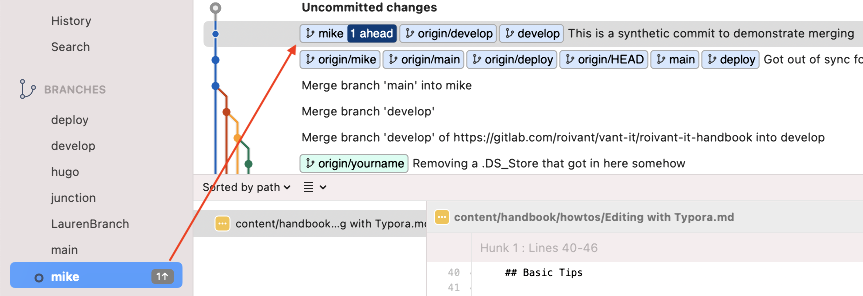
Now, you’ll be able to see that your branch has integrated the change(s) from the other branch. Also, now that you’ve
merged in new changes, your local copy of “mike” is one or more commits ahead of the remote “mike”. This is fine,
and we’ll address it when we push.
Edit some content
At this point, you’re all caught up to remote branch(es) and you can edit and change whatever you like, such as this page. We’re going to demonstrate adding a new page (this one) and editing an existing page. In these screenshots, you may notice some complex-looking tags, such as those above. Those are small snippets of raw HTML and Hugo Shortcodes. Don’t worry about those, you won’t need to deal with them manually and we’ll address writing techniques elsewhere.
Committing Your Changes
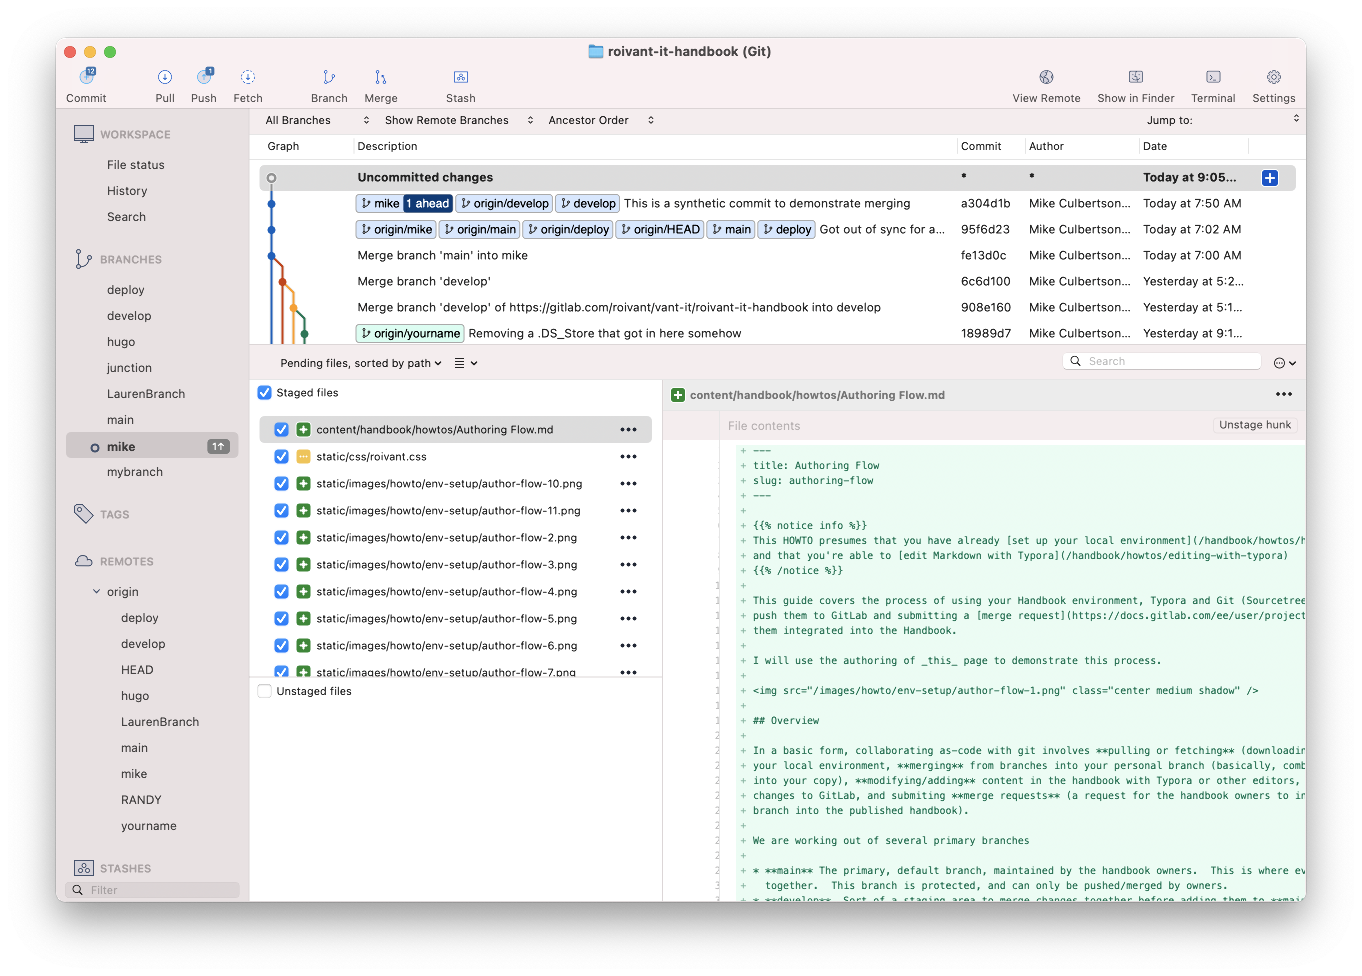
As with this page as I write it, you may have written enough that you’d like to commit your changes to your local repo, with the intent of pushing them to GitLab. Let’s look at Sourcetree to see what changes we have pending commit. Select your branch on the left, and select “Uncommitted Changes” in the graph panel. Under the “Unstaged files” panel, you’ll see all the files that either changed or not yet added to this branch. In our case, this page (Authoring flow.md) and all the screenshots from this page have a question mark, indicating they are not added yet (new). One file, “roivant.css” has an orange box, indicating it has been modified. You can click around this list of files to see what changes were made, in the content panel.

We want to commit all these changes, so select the checkbox next to “Unstaged files” to select them all, and they’ll all jump up to the “Staged files” panel. You can always uncheck one or more if you change your mind on any. Also note the “Commit” button at the top now has a number next to it (it’s the number of pending changes to commit)
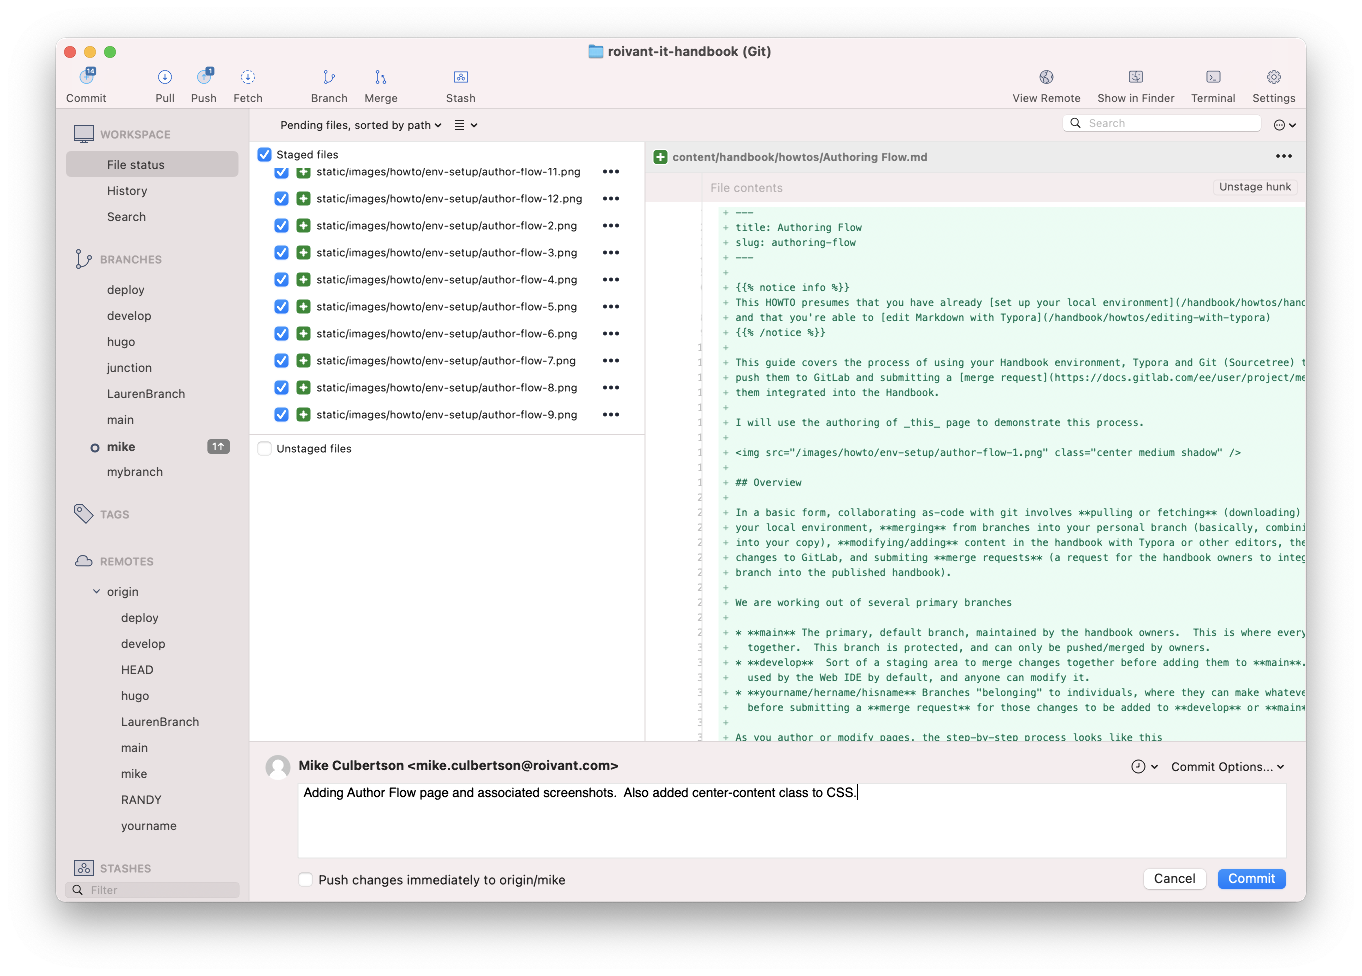
Hit the “Commit” button. A text area will appear at the bottom of the window - add a meaningful comment on what was changed, and hit “Commit”. Leave “immediately push” unchecked, as we’ll demonstrate that separately. In the future, you’re welcome to commit+push on your own branch at the same time as you see fit.
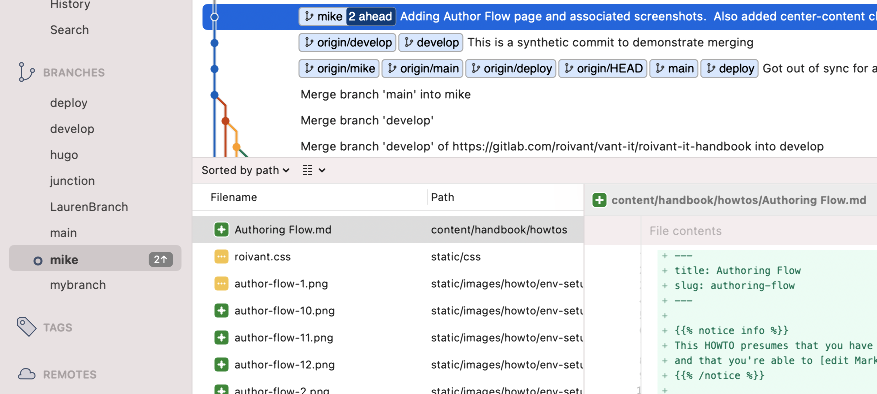
You’ll now see that we’re two commits ahead of our remote version (one from merging develop, one from the commit we just did)
Pushing your changes to GitLab
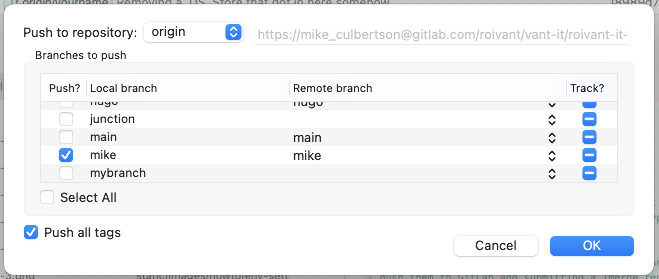
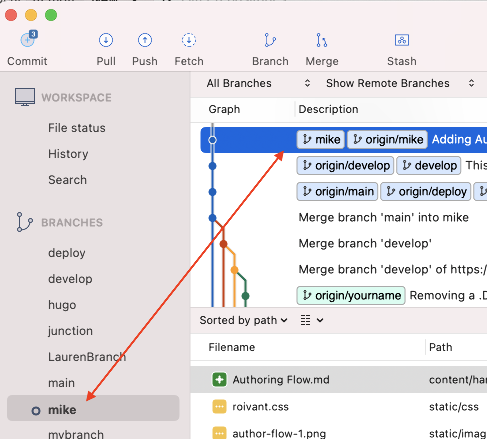
Now, presume you’ve made all the changes you want, and you’ve committed them locally. It’s time to push these changes to GitLab, where they can be shown to colleagues and/or submitted for inclusion into the main handbook. Simply make sure your branch is selected and highlighted on the left, and hit the “Push” button. One dialog will pop up - ensure that the branch you intend to push is checked (in this case, “mike”) and hit “OK”. Sourcetree will perform the push and drop you back to the main window, where you can see that “mike” and “origin/mike” are lined up in the graph view, and there’s no longer a numbered up-arrow next to “mike” on the left - meaning all your committed changes have been pushed.
Merge develop into mike
Confirm the merge
Confirm the merge
Creating a Merge Request in GitLab
A note about MRs - a merge request is from one branch to another, e.g. to merge mike into main. If you submit an MR for your personal branch, then you commit+push more changes after that, they will be pulled in to that same MR, if it has not already been closed. This is a very handy feature because if you miss an edit or make a mistake, you don’t have to retract an MR, or submit a new one - just make changes, commit and push your branch and as long as the MR is still open, the new changes will be included. You only need to submit a new MR after your last one for you branch has been accepted.
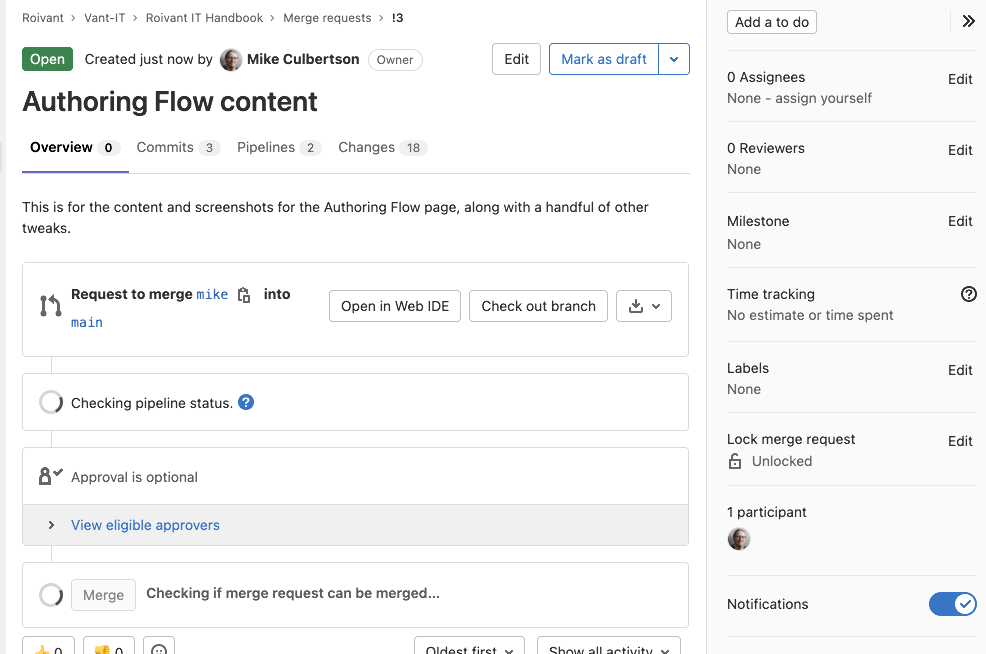
When you reach a point where you have committed and pushed changes that you would like to have merged into the main branch, it’s time to submit a Merge Request. This will alert the handbook owners that you have new or updated content, and allow them to check it and handle merging it in to the mainline, which can sometimes be more complicated than working in your own personal branch.
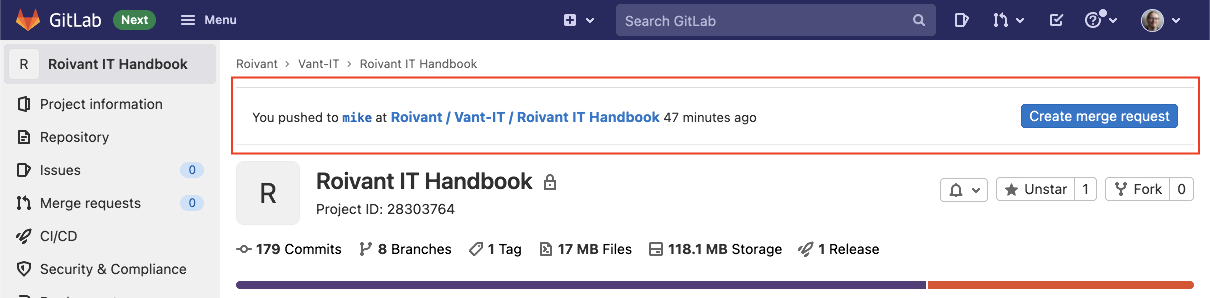
To create a Merge Request, we have to use the GitLab web interface, and Sourcetree offers a convenient way to go directly to the correct spot. Just click the “View Remote” button at the top of the Sourcetree window and it will open directly to the Roivant IT Handbook page in GitLab. Since you have pushed already, right at the top of the page, there should be a notice and a button to “Create merge request”.
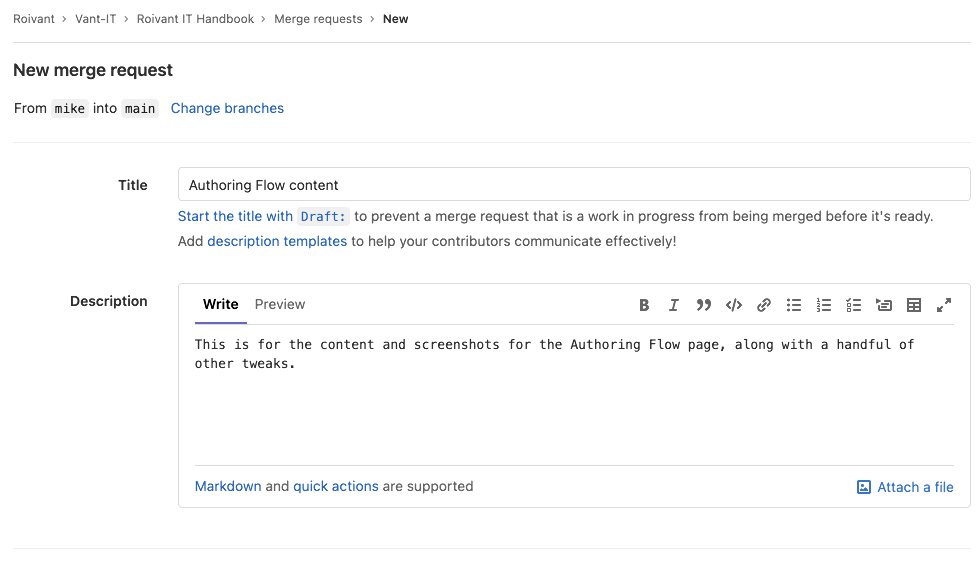
When you click this button, it will take you to the Merge Request form. Give your MR a title and an informative description of what this MR contains. Keep in mind, an MR will merge an entire branch - and there may be many commits in your branch, so use the description to summarize all the changes in your branch. The other fields in the MR form, such as Assignee, Reviewer, Milestone, etc are optional - if you assign it directly to someone, make sure you talk to them first. In general, you can just leave them blank.
Once you submit your MR, you will be dropped to the MR page, where you may see tests running, and you can edit, cancel and otherwise change the request as needed.